
Blue-Green Deployments involve running two identical environments (blue and green) for seamless updates and rollback options. This guide explains setting up Blue-Green Deployments with Kubernetes and Harness, ensuring smooth, zero-downtime releases through automated workflows and health checks.
Deploying to production is a bit like dancing drunk in a dive bar. You have to do it, but it's all about avoiding collateral damage (and downtime) at the end of the day. There are many deployment strategies for Continuous Delivery. Blue-green deployments and canary deployments tend to be the most common these days.
What is a Blue-Green Deployment?
Blue-Green is about having two identical environments called “blue” (aka staging) and “green” (aka production) run simultaneously with different versions of service/artifact. QA and UAT are typically done in the blue environment. When satisfied, traffic is flipped (via a load balancer) from the green environment (current version) to the blue environment (new version). You then have the option of decommissioning the old environment or rolling back to it should your deployment succeed or fail.

In this blog, we'll build a blue-green deployment using Kubernetes and Harness.
Step 1: Create New Application
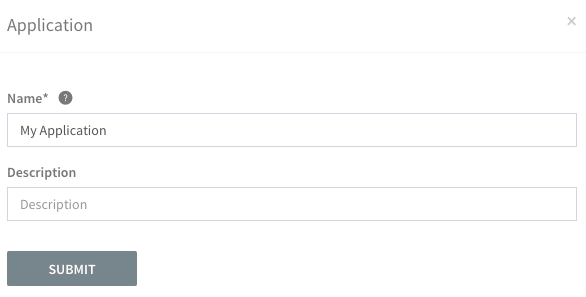
Go to: Setup > Applications > Create New Application
It should take you 10 seconds to create a new application (a logical group to manage services and artifacts).
Step 2: Create New Service
Obviously, we need something to deploy, so let’s create a new service.
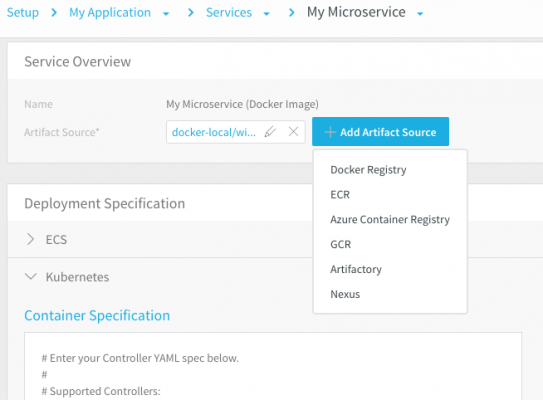
Go to: Setup > Your Application > Add Service
Enter “My Microservice” as the service name and choose “Docker Image” as the artifact type. Next, add the artifact source by referencing the specific artifact from your repository. This should take 20 seconds.
Step 3: Create New Environment
We obviously now need somewhere to deploy our new service and artifact.
Go to: Setup > Your Application > Add Environment
Name your environment “Production” and choose “production” as the environment type. Next, click “Add Service Infrastructure,” select “My Microservice” as your service, and then select “Kubernetes” as the deployment type. Next, choose your Cloud Provider account that supports Kubernetes, and desired cluster to deploy to. This process should take 20 seconds.

Step 4: Create Blue-Green Deployment Workflow
Workflows tell Harness how to deploy services to environments.
Go to: Setup > Your Application > Add Workflow
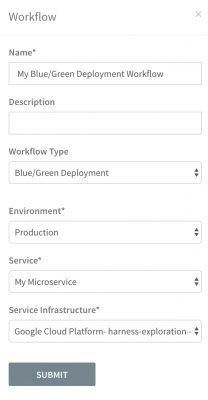
Name your workflow, select “Blue-Green Deployment” as Workflow type, and then select the Environment you have just created (Production) along with the Service (My Microservice) and the Service Infrastructure (Kubernetes Cluster). This should take you 10 seconds.
Step 5: Configure Your Blue-Green Deployment
Most of the default setup and configuration required for blue-green deployments is taken care of by Harness out-of-the-box. The only requirement or pre-requisite is that you’re using Kubernetes to deploy your service artifacts.
For example, by default, we’ll spin up the same number of instances in your blue (staging) environment that is already running in your green (production) environment. You can also add optional configuration (#1 in the screenshot) for Kubernetes HPA and Ingress rules if required.

The big win with Harness is that you can automate the verification (health checks) of your blue-green deployment in step #3 above. Once you setup and deploy the containers in your blue (staging) environment you can run Continuous Verification using your existing APM and log management tools so that you can validate your blue-staging deployment.
Manual approvals can also be added after verification has completed. This allows you to manually “flip the switch” when you’re ready so that all traffic gets directed from the green environment (current version) to the blue environment (new version). Rollback steps (top right of the above screenshot) can also be added so you can flip the switch back again should your deployment fail in the future.
Blue-green deployment workflows can also be “templatized” with variables so that other dev teams can reuse them. For example, you could introduce artifact and environment as workflow variables which can be later injected at deployment time by each dev team using CURL or webhooks. Many of our customers create gold templates for deployments and then use RBAC to assign these templates to each dev team for rollout and scale. Create once, deploy many times is typically best practice instead of having a separate deployment workflow for each artifact and environment.
Step 6: Run Your Blue-Green Workflow
Once you’ve configured your blue-green deployment workflow, you can attach it to a Harness pipeline or trigger for execution.
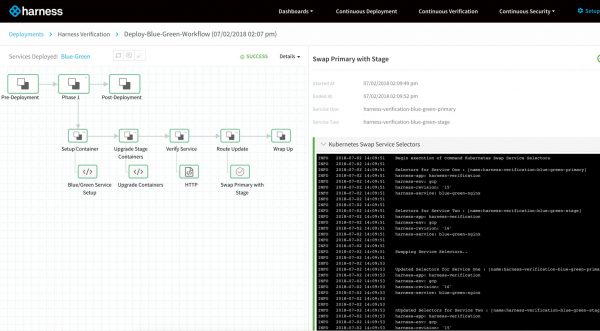
When your blue-green deployment is running, it will look something like this:
Sign up for your free trial of the Harness platform and build your own blue-green deployments in minutes.
Cheers!
Steve
@BurtonSays
All this author’s posts
Harness is a unified, end-to-end AI software delivery platform to manage the SDLC using purpose-built AI agents