
Harness integrates Continuous Integration (CI) and Continuous Delivery (CD) to streamline the deployment process from code to production, enabling seamless Docker image builds and Kubernetes cluster deployments with minimal setup.
Harness now allows you to have both best of breed Continuous Integration and Continuous Delivery capabilities. Let’s take a look at what leveraging a Harness CI / Drone Pipeline to build then leveraging Harness CD to deploy to a Kubernetes cluster.
The goal of this example will be to have Harness CI / Drone build and push a GoLang Docker Image to DockerHub then have Harness CD pickup on the new artifact and deploy to an awaiting Kubernetes cluster. This potentially can take you from idea to production easier than ever.
The Moving Pieces
There are not many moving pieces to see an end-to-end example. You need a Harness CI / Drone Instance, a Docker Hub Account, a Harness Account, and of course, a Kubernetes cluster which could even be Minikube.
Like always you can follow along with the blog and/or watch the video.
If leveraging the example Harness CI / Drone GitHub project, you will have to edit the information to be your own Docker Registry for where the Docker Push goes. I will be referencing mine below.
The Harness CD Piece
If this is your first time leveraging the Harness Platform, the quickest way to get started is to leverage a Kubernetes Delegate.
The first step of getting a Harness Delegate installed in your Kubernetes Cluster is pretty straight forward.
Setup -> Harness Delegates -> Download Delegates -> Kubernetes YAML

Give the Delegate a name.
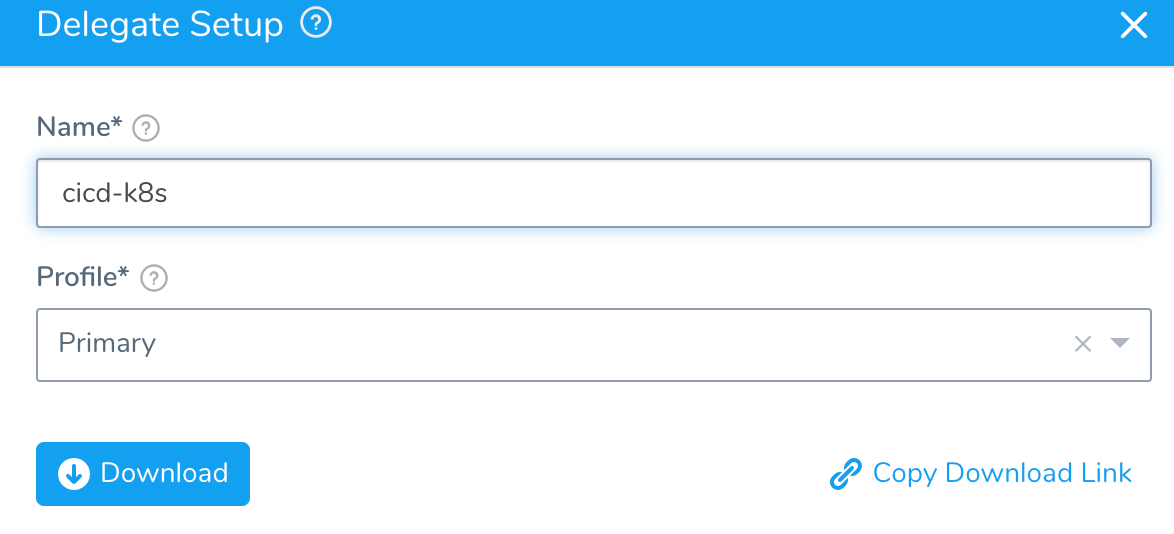
Hit submit to download. Expand the tar.gz which is downloaded.

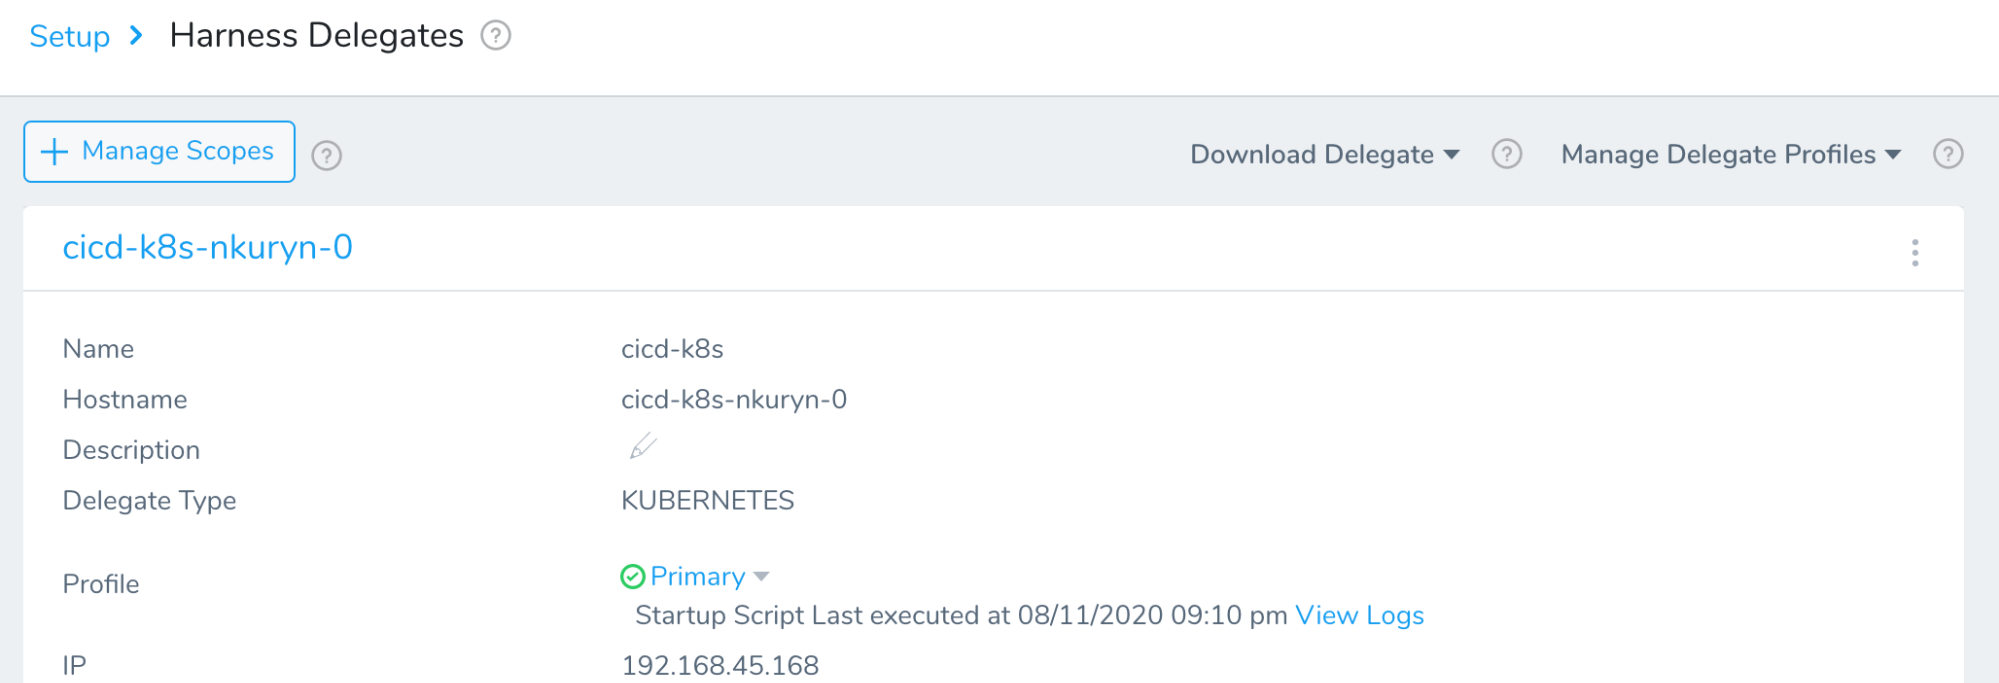
Inside the delegate folder, run kubectl apply -f harness-delegate.yaml to install the delegate.

In a few moments, your Harness Delegate will be available.
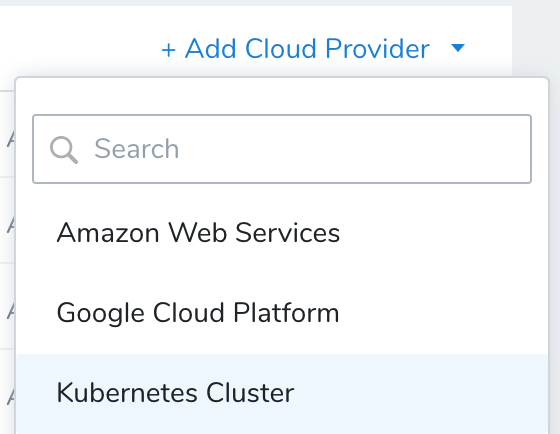
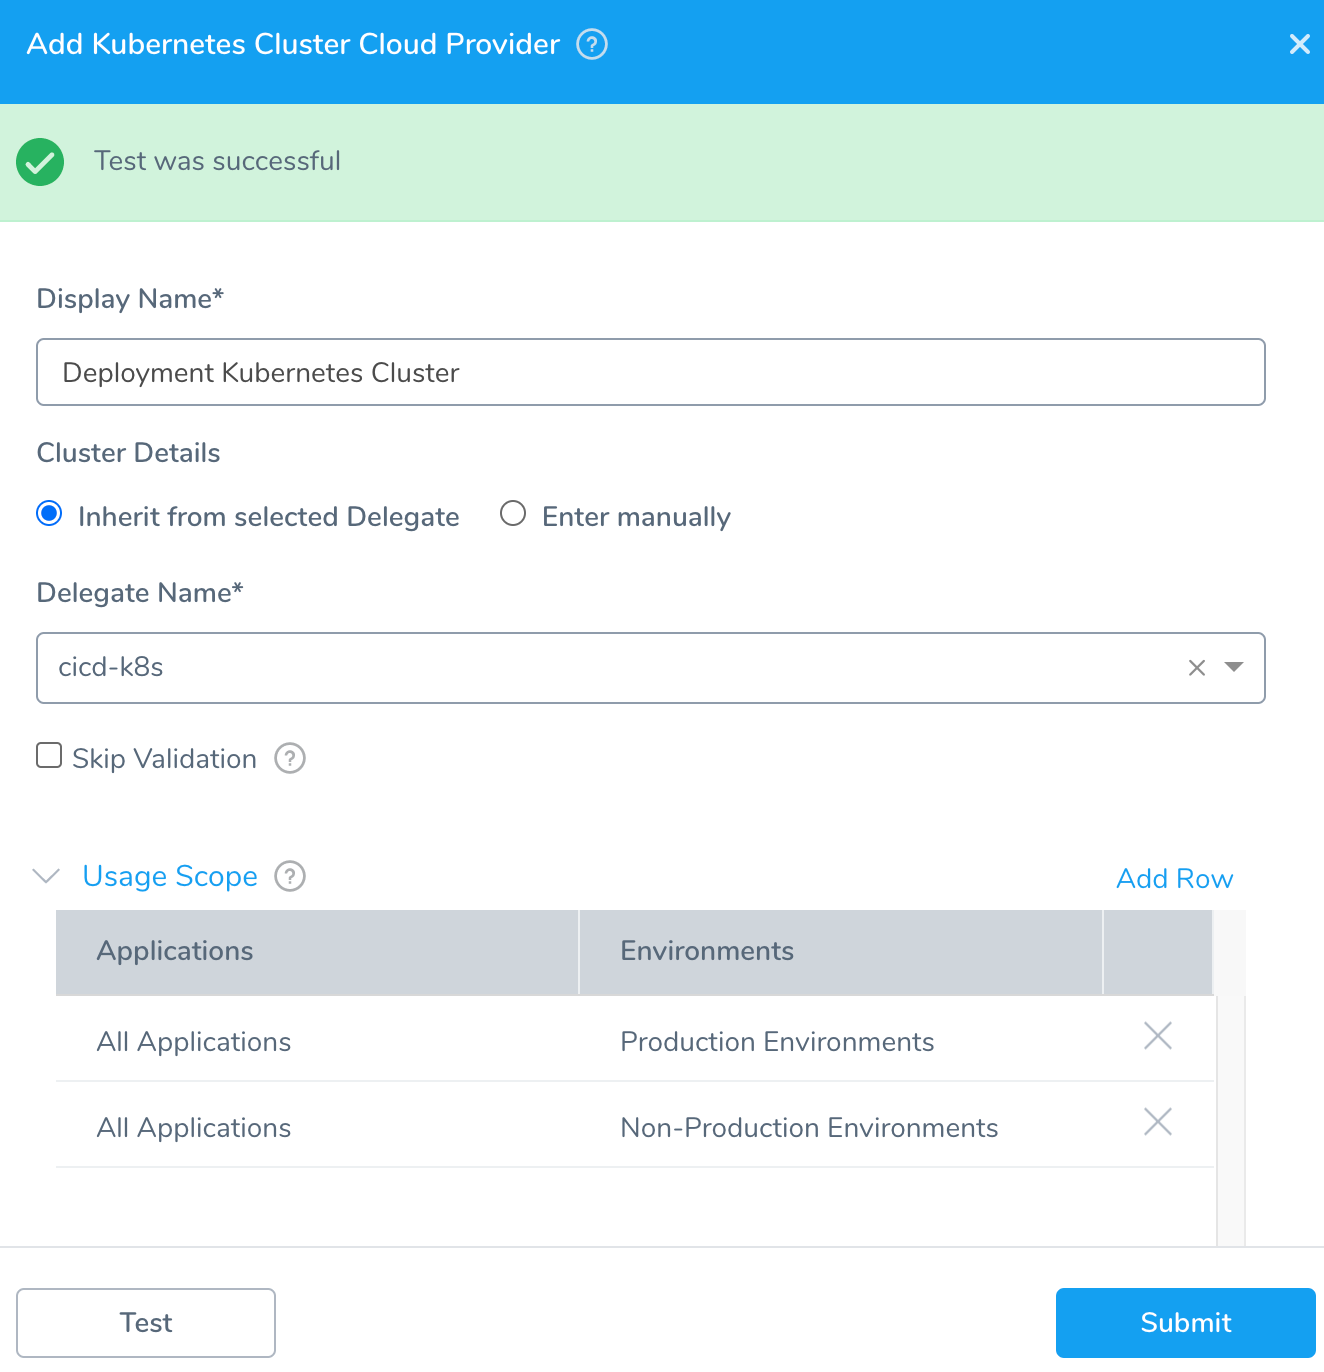
Next, add the Kubernetes cluster for Harness to deploy to by adding the Kubernetes cluster as a Cloud Provider.
Setup -> Cloud Providers + Add Cloud Provider

Add a Kubernetes Cluster
Give the Kubernetes cluster a name then for Cluster Details, Inherit from selected Delegate [deployed Delegate]. Hit Test then Submit and you are all wired up.
Next, creating a Harness Application is a simple process.
Setup -> + Add Application.

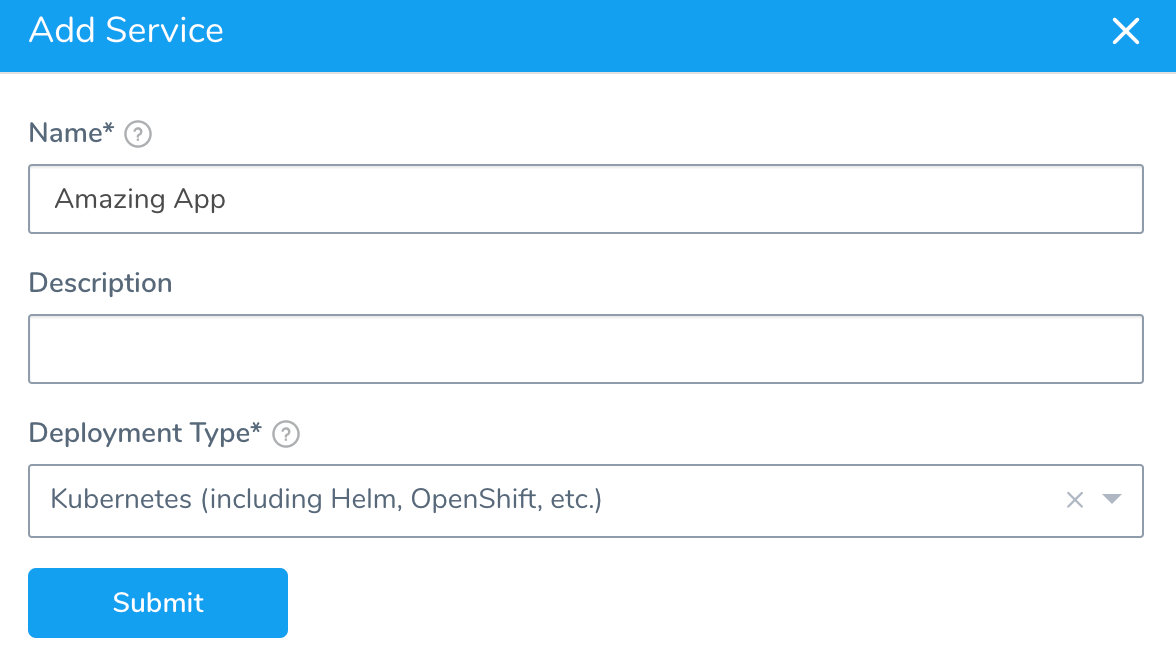
The next step inside the Application is to create a Harness Service. You can create a Service by going to
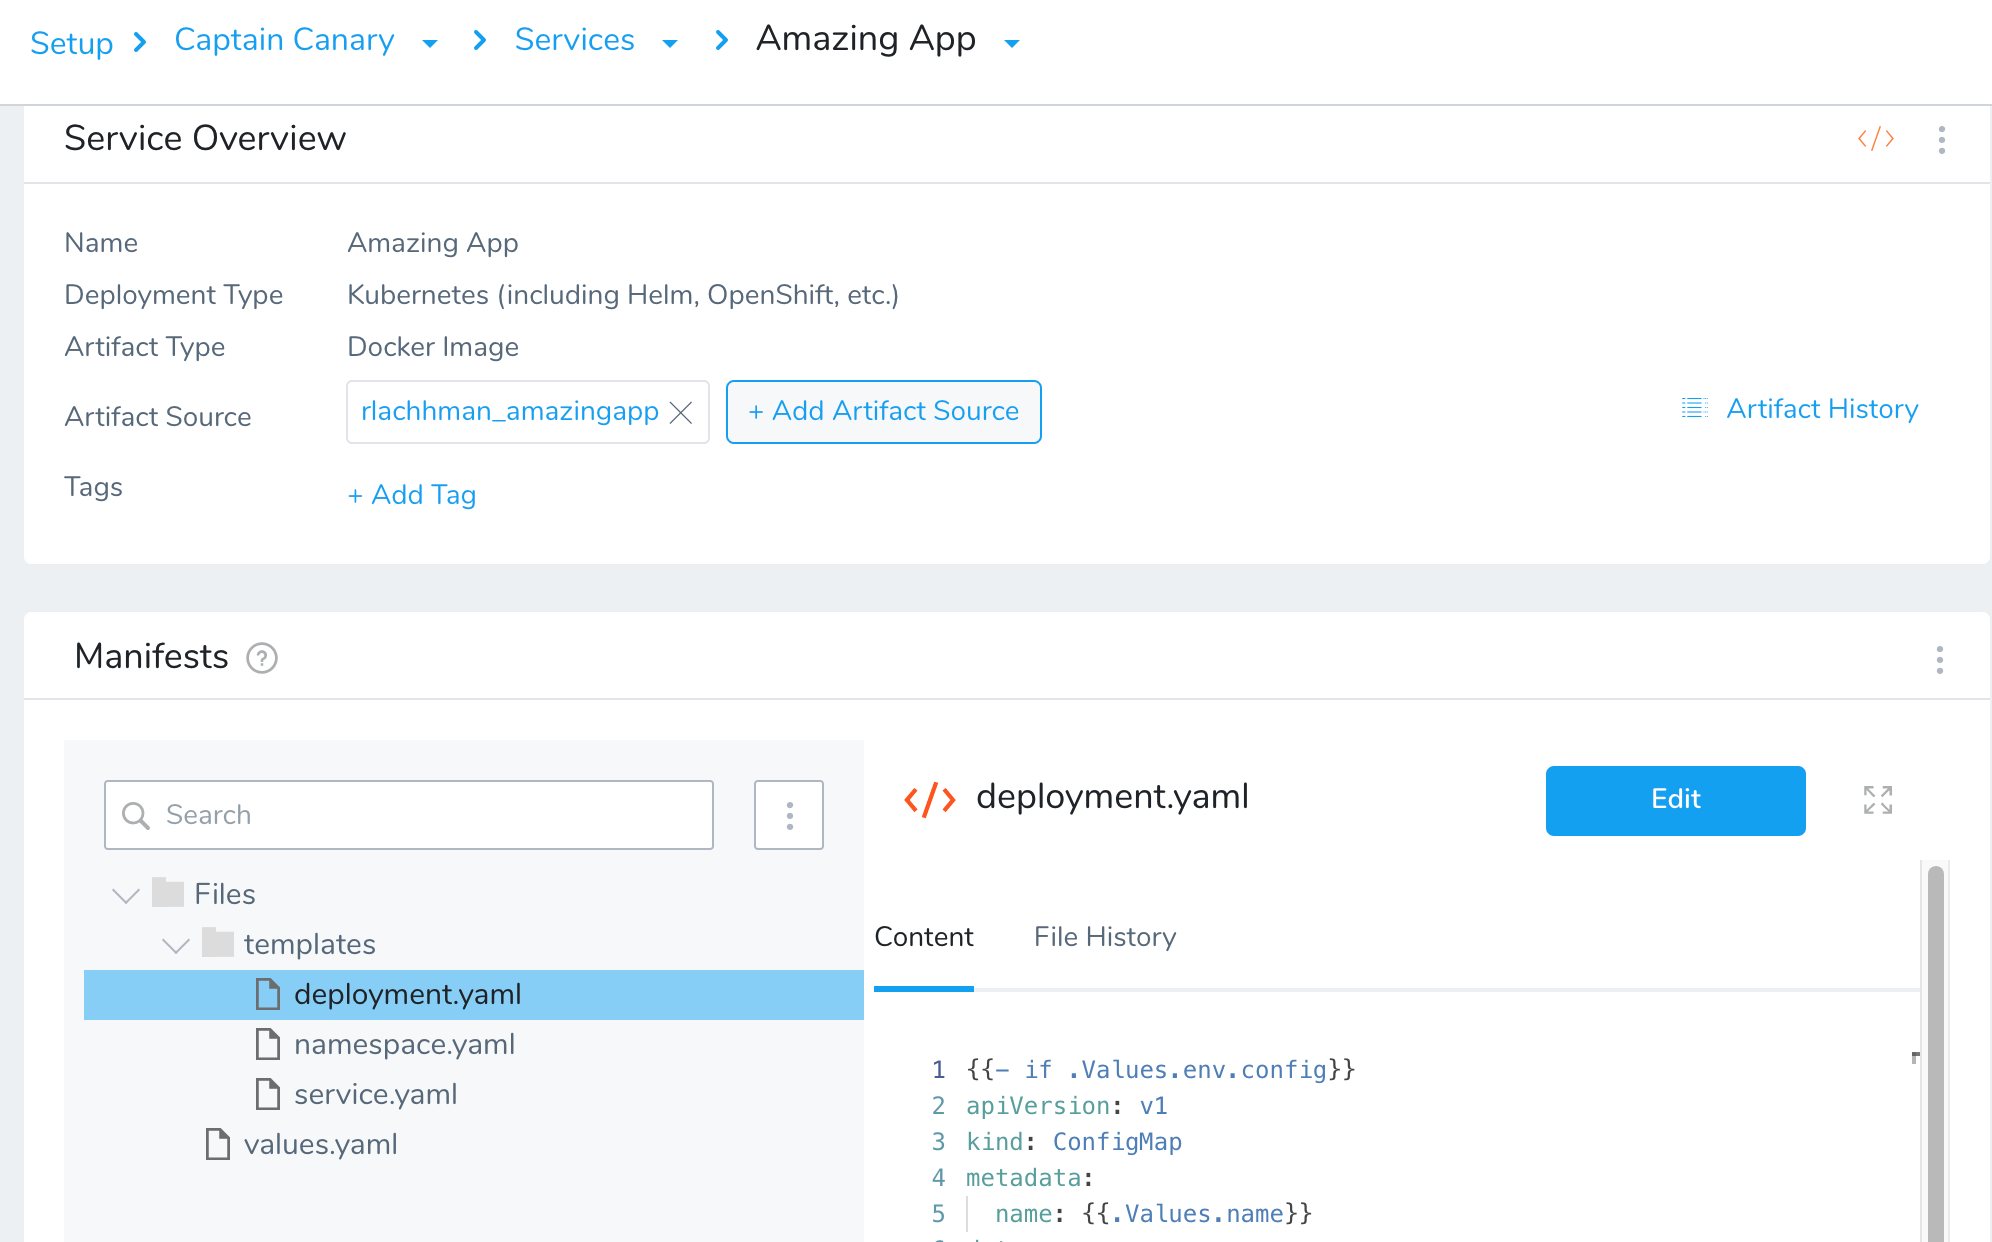
Setup -> Captain Canary -> Services + Add Service. The Deployment Type will be Kubernetes.
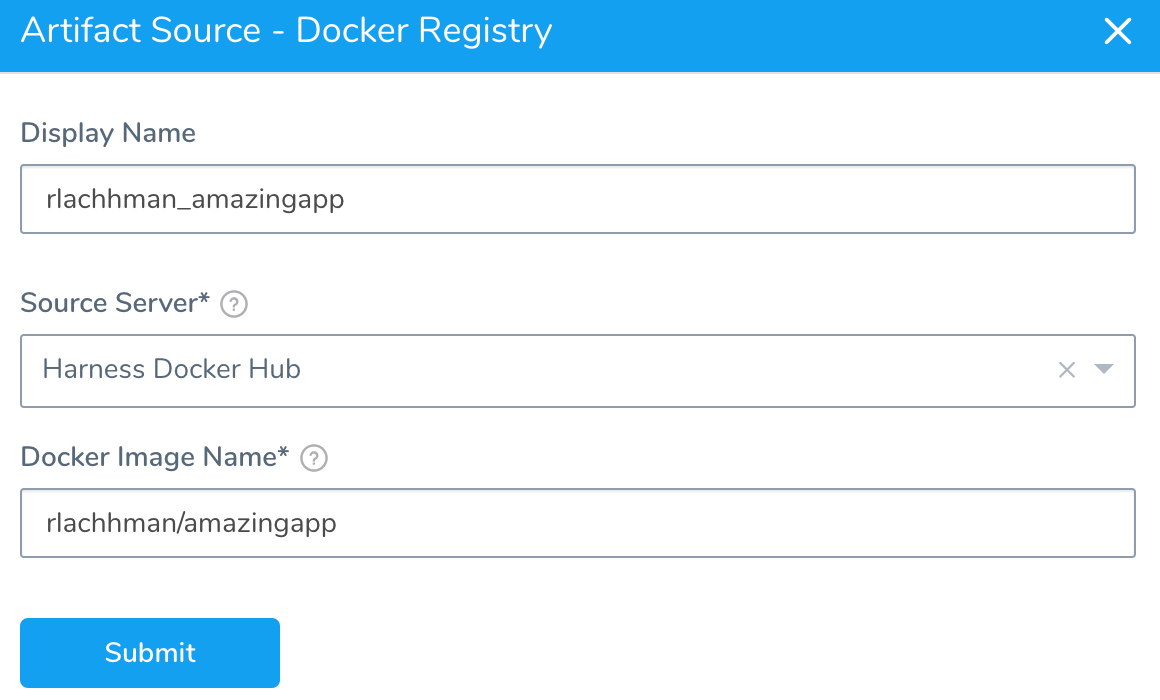
Inside the Amazing App Service, + Add Artifact Source from a Docker Registry
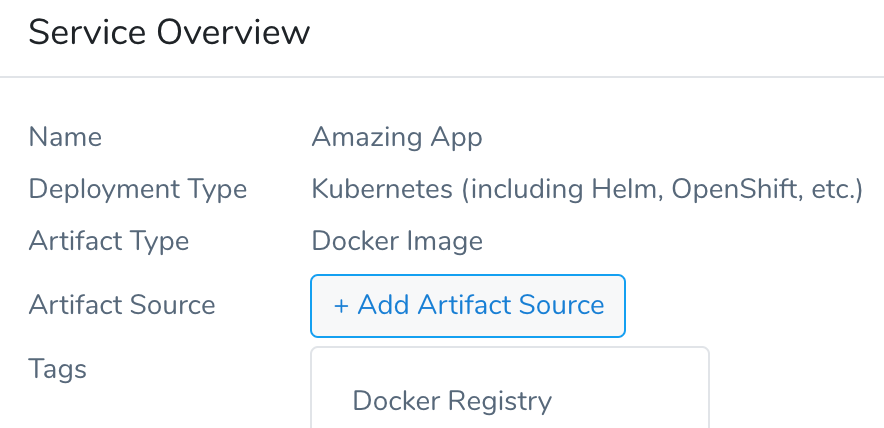
Can wire to your Docker Image of choice.
Once you hit submit, the scaffolding will be there for the deployment and no need for additional configuration.
With the Service out of the way, we can wire a Harness Environment to deploy to.
Setup -> Captain Canary -> Environments + Add Environment
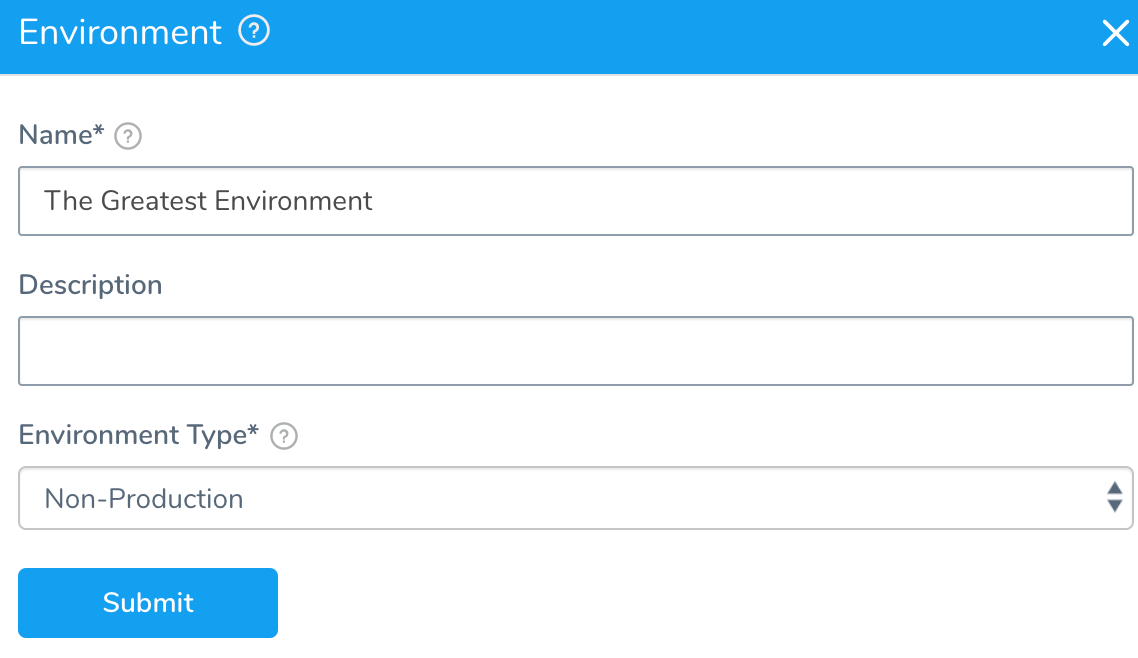
Once you hit Submit, next can wire an Infrastructure Definition.

Next click + Add Infrastructure and add the Kubernetes cluster. The Cloud Provider Type and Deployment Type will be Kubernetes.
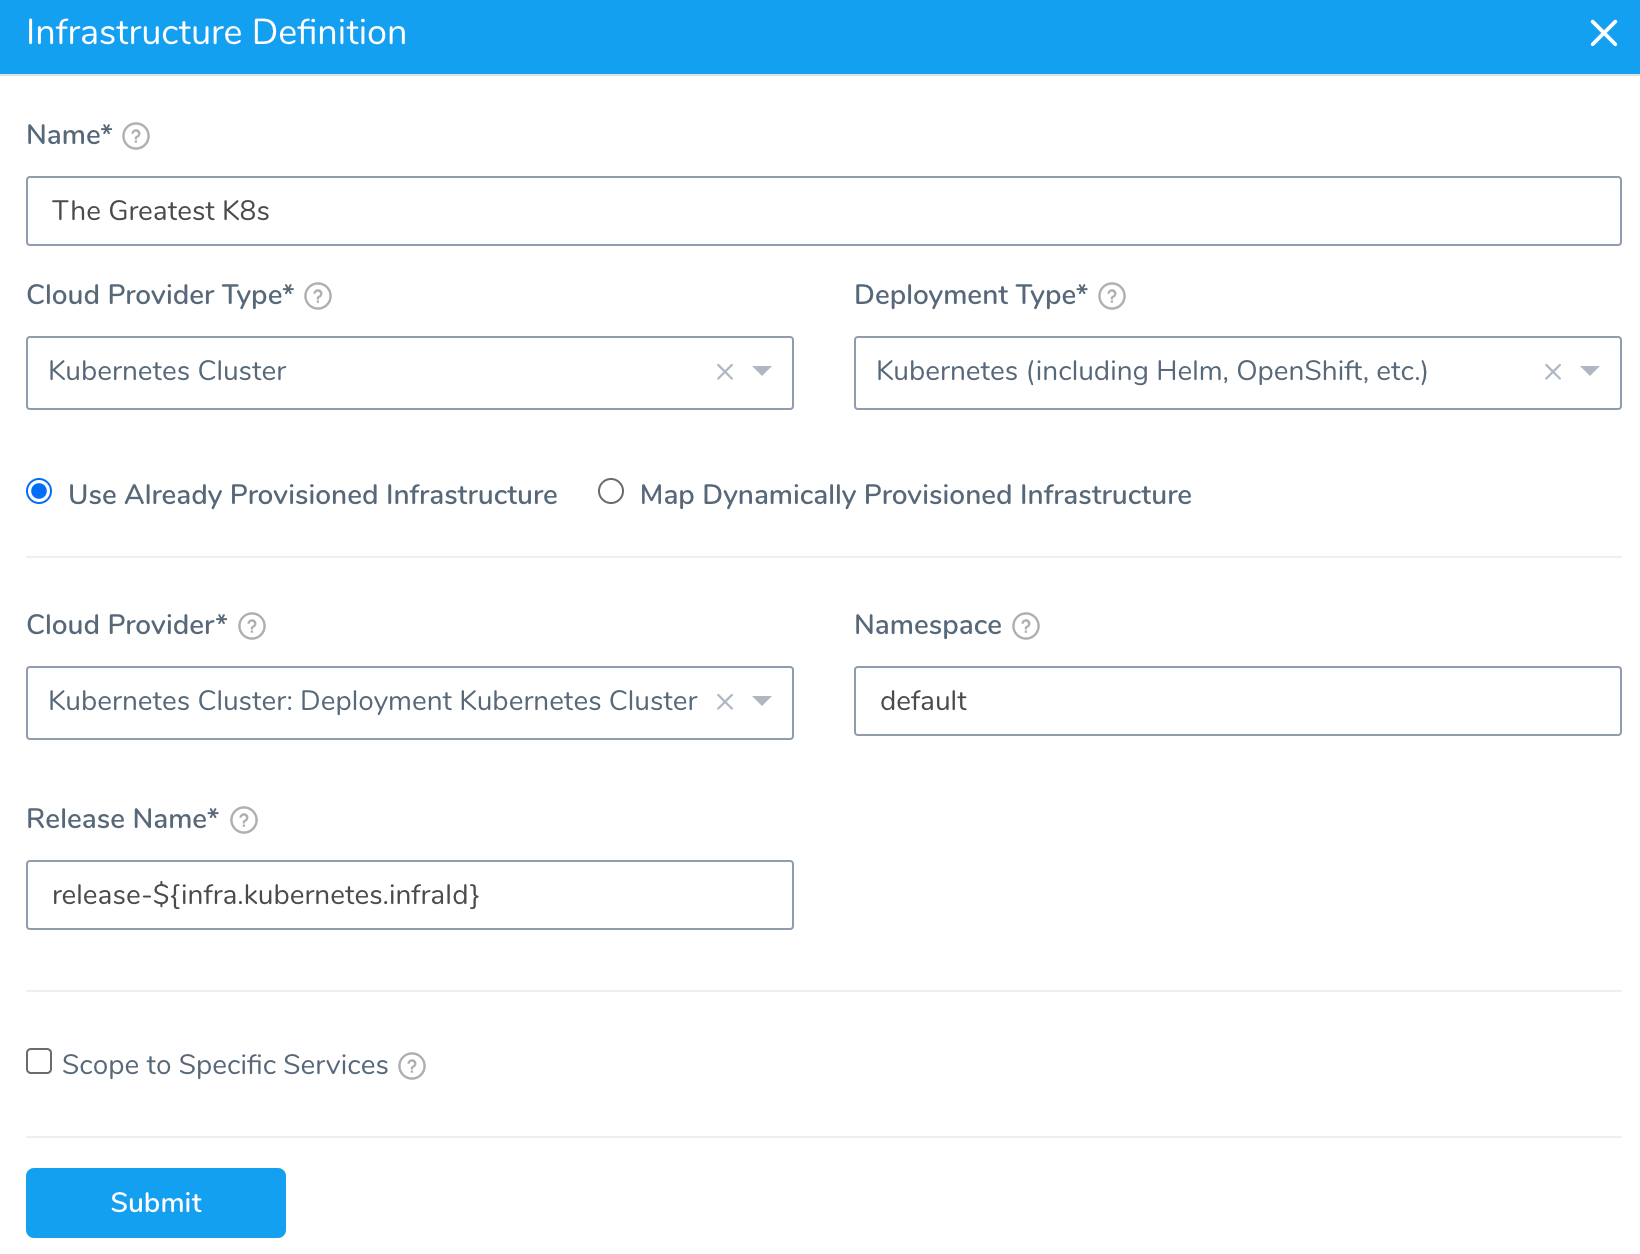
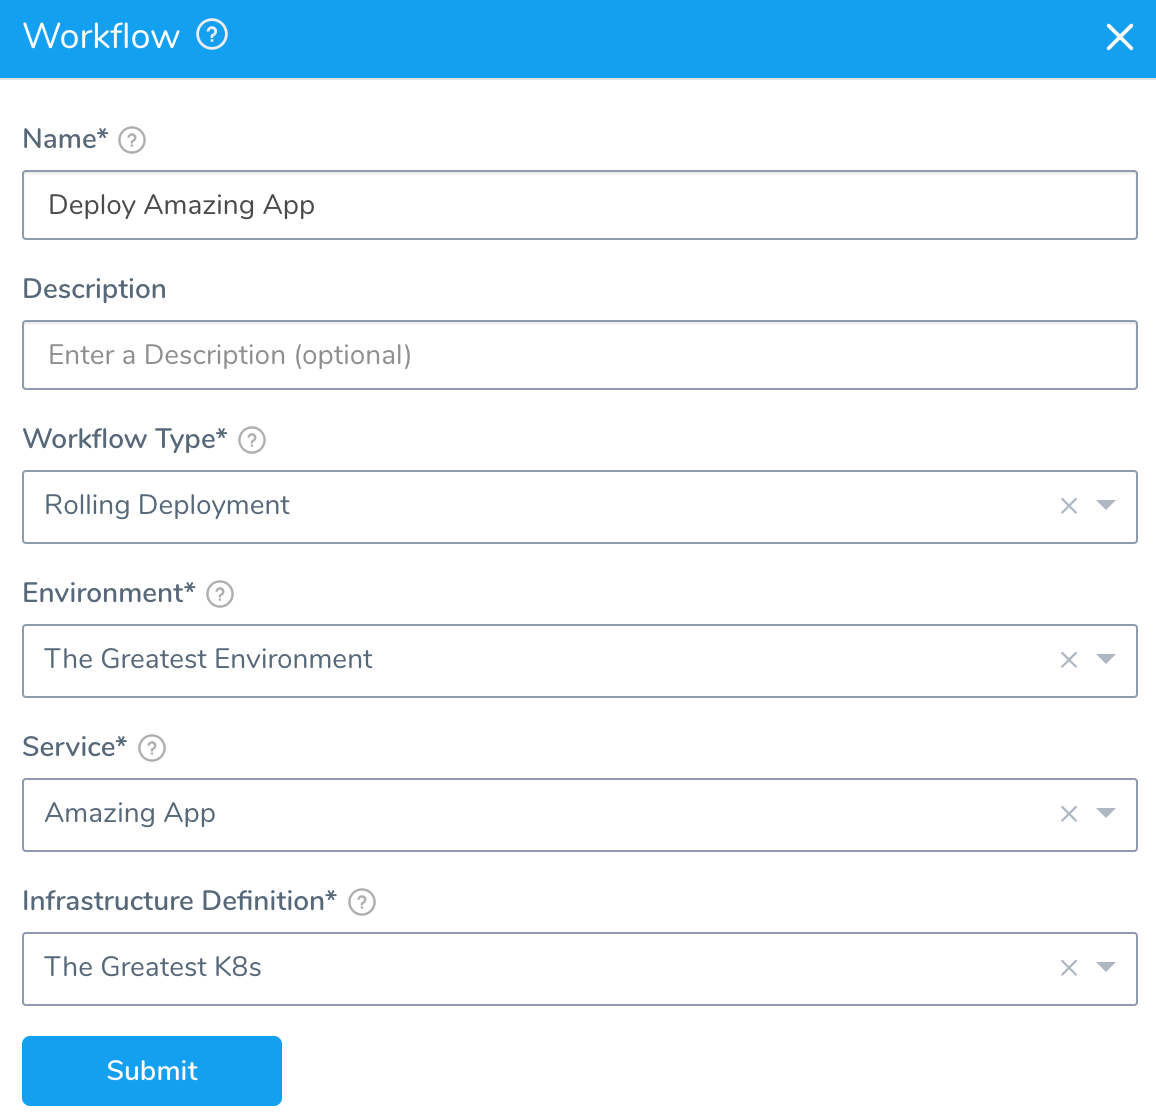
Once you hit Submit, can wire together a Harness Workflow to define the steps to deploy.
Setup -> Captain Canary -> Workflows + Add Workflow. The Workflow Type will be Rolling Deployment. Select the Environment, Service, and Infrastructure Definition that was created in the previous steps.
Next you can create a Harness Trigger on the presence of a new artifact in DockerHub. This will trigger the Workflow once the Docker Push is complete in the Harness CI / Drone Pipeline.
Setup -> Captain Canary -> Triggers + Add Trigger
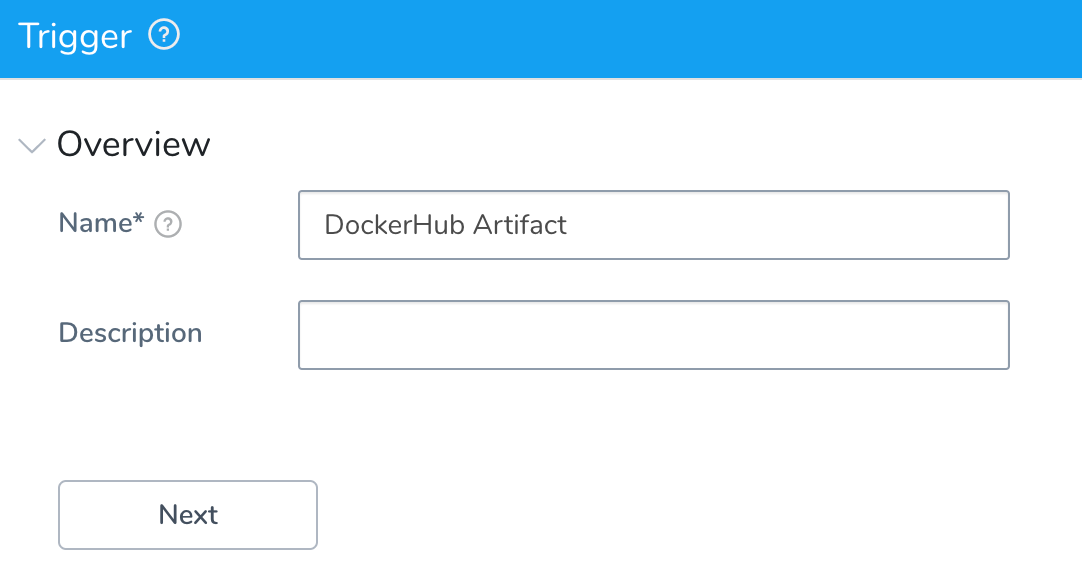
Hit Next after giving a Name. DockerHub can send out a webhook or we can use a polling interval from Harness to look out for a new artifact. Without the need to manage webhooks, we can just simply configure On New Artifact. Select your artifact source and can filter on specific tags. For the example we just want to deploy what gets picked up and “.*” is fine as a filter.

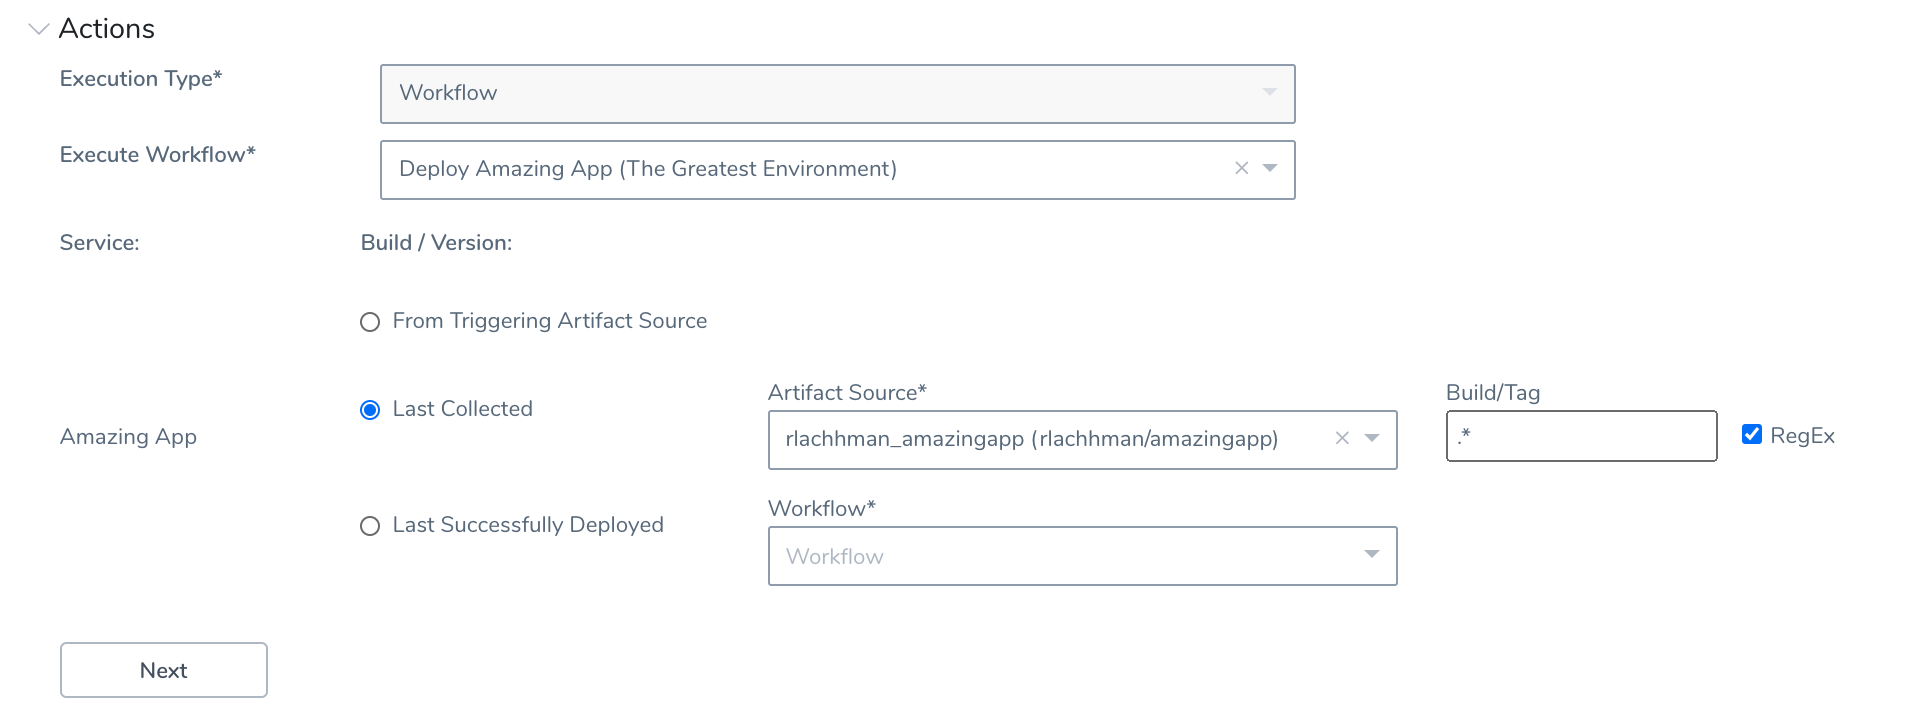
Hit Next and define the Actions. Execution Type will be Workflow and will execute the Workflow that was created in the previous steps. Can leverage the Last Collected Artifact. If leveraging the example will pick up on the newest explicit tag with the same filter “.*”.
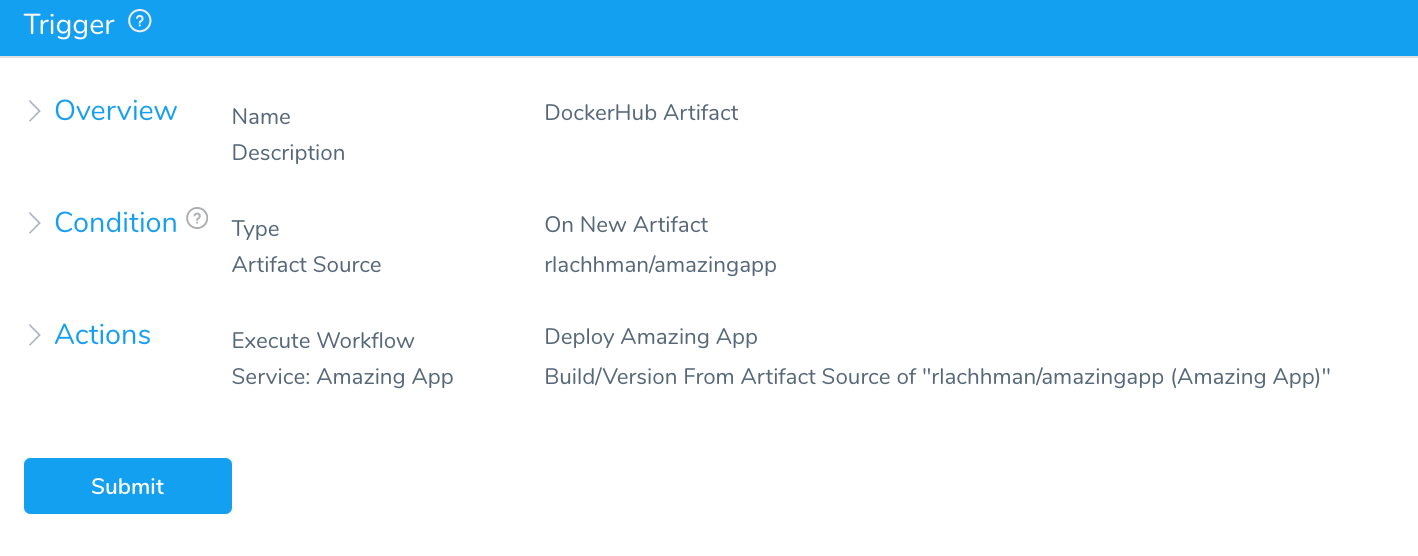
Click Next and review the Trigger then hit Submit.
Once you hit Submit, all you have to do is kick off a Harness CI / Drone build and push.
Harness CI / Drone Steps
If you do not have a don’t have a running Harness CI / Drone instance don’t worry, not difficult to accomplish. We have a detailed blog and video to get you started. For the example to work will need to be building and pushing a Docker Artifact. The example project has a simple GoLang application. The Harness CI / Drone introduction blog and video go through wiring Harness CI / Drone to a GitHub repository.
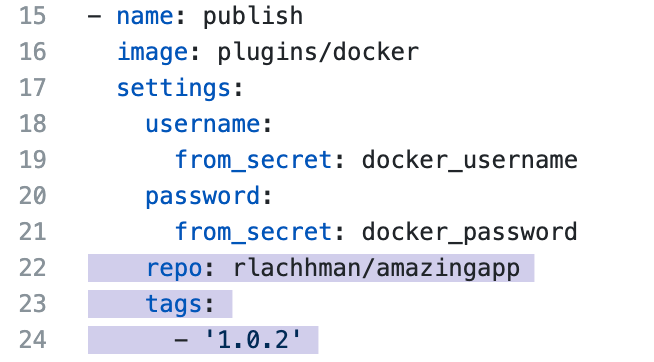
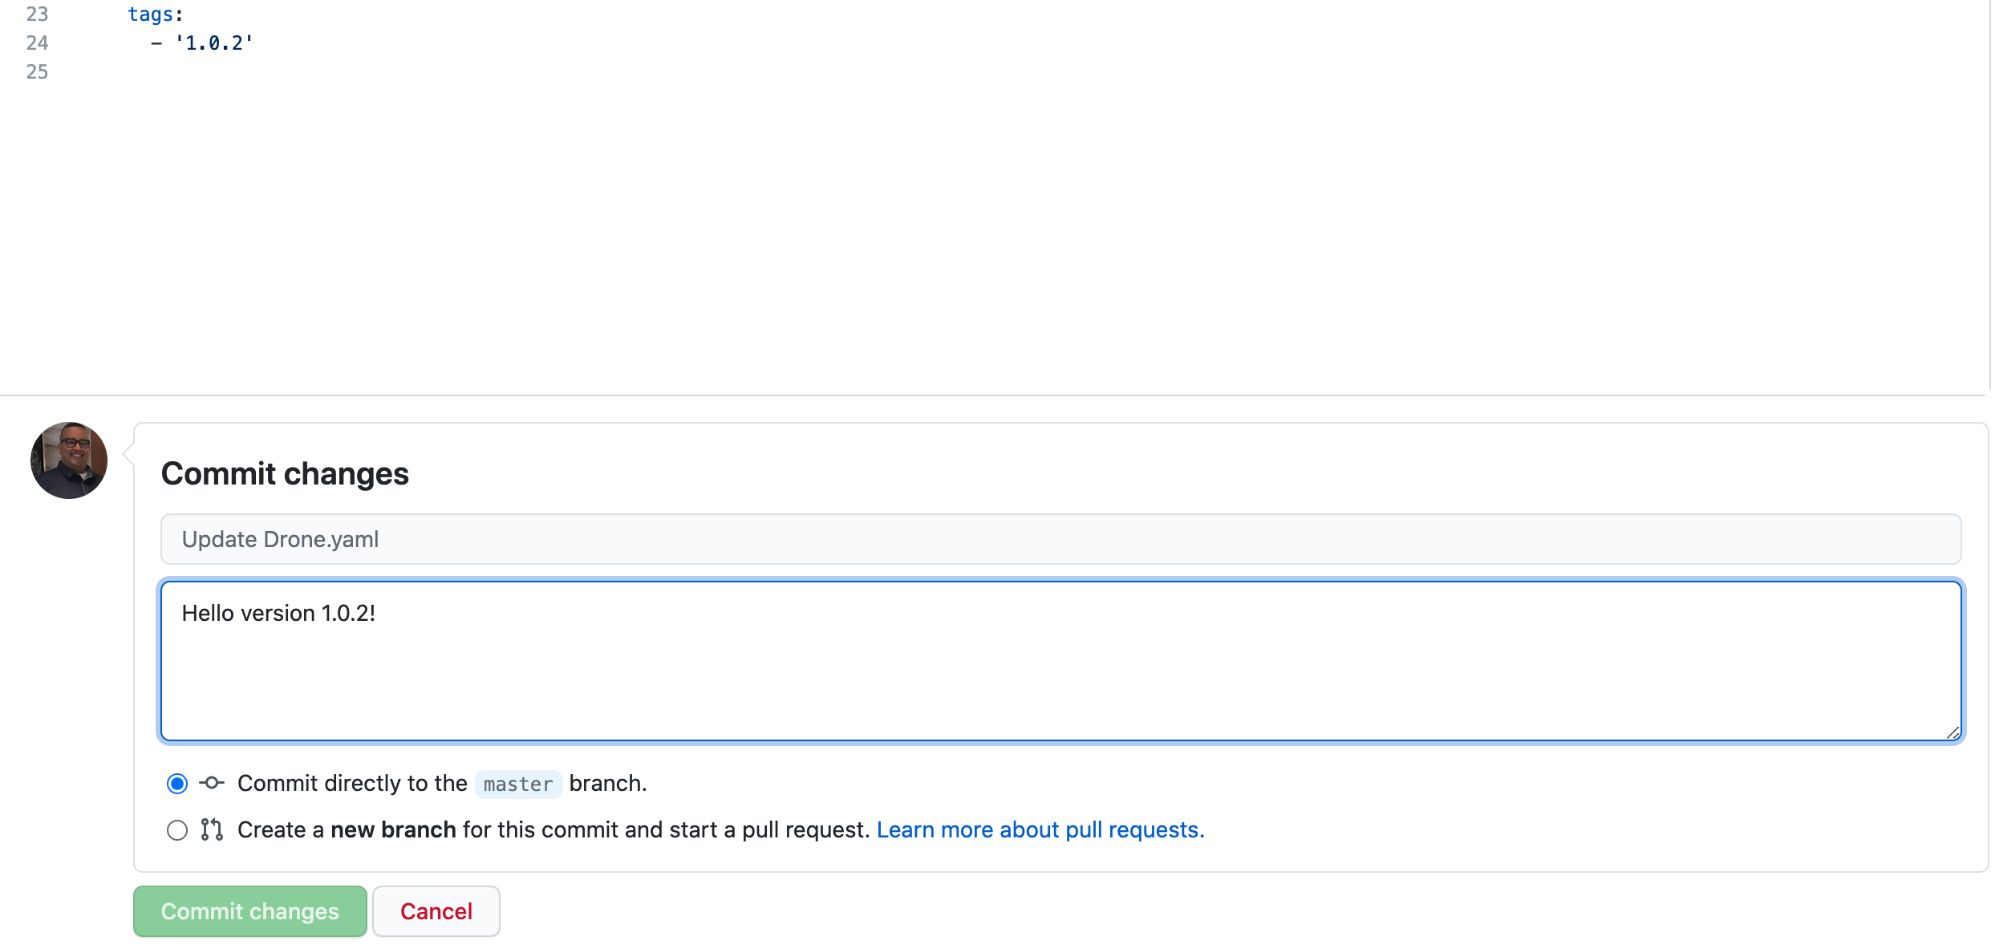
To kick off a Harness CI / Drone Build and Push, simply modify the configuration / Drone.yaml which Harness CI / Drone is monitoring for. To explicitly build to a specific version, can add tags to Drone.yaml which works well with the example.
In the example, pushing build version 1.0.2. Make sure to update your repository information also.
Can modify/increment then commit.
Once you hit Commit, Harness CI / Drone will take over.
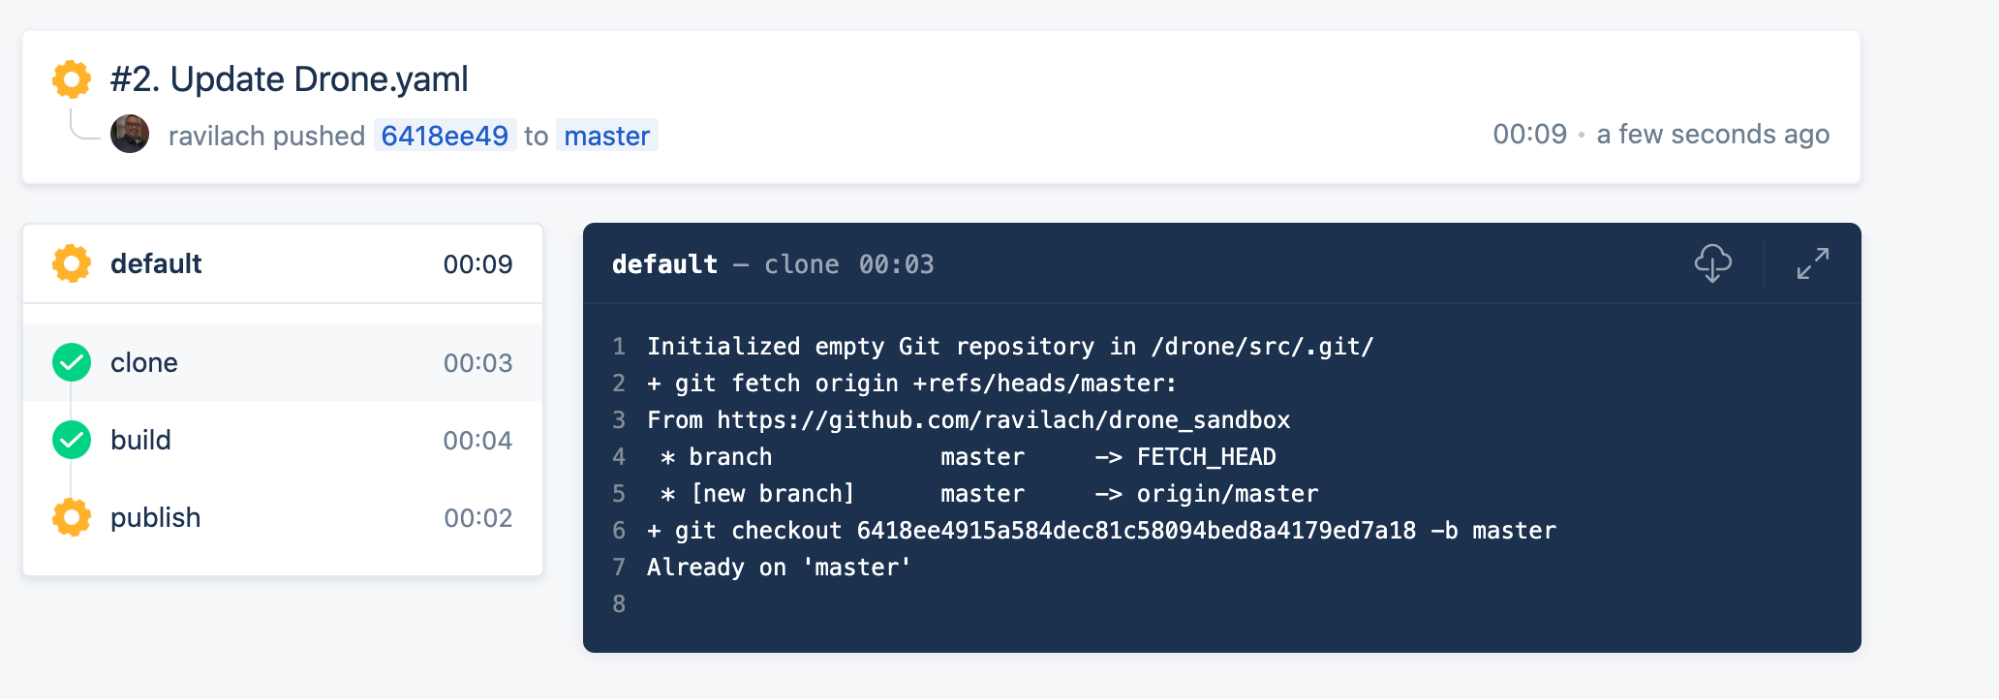
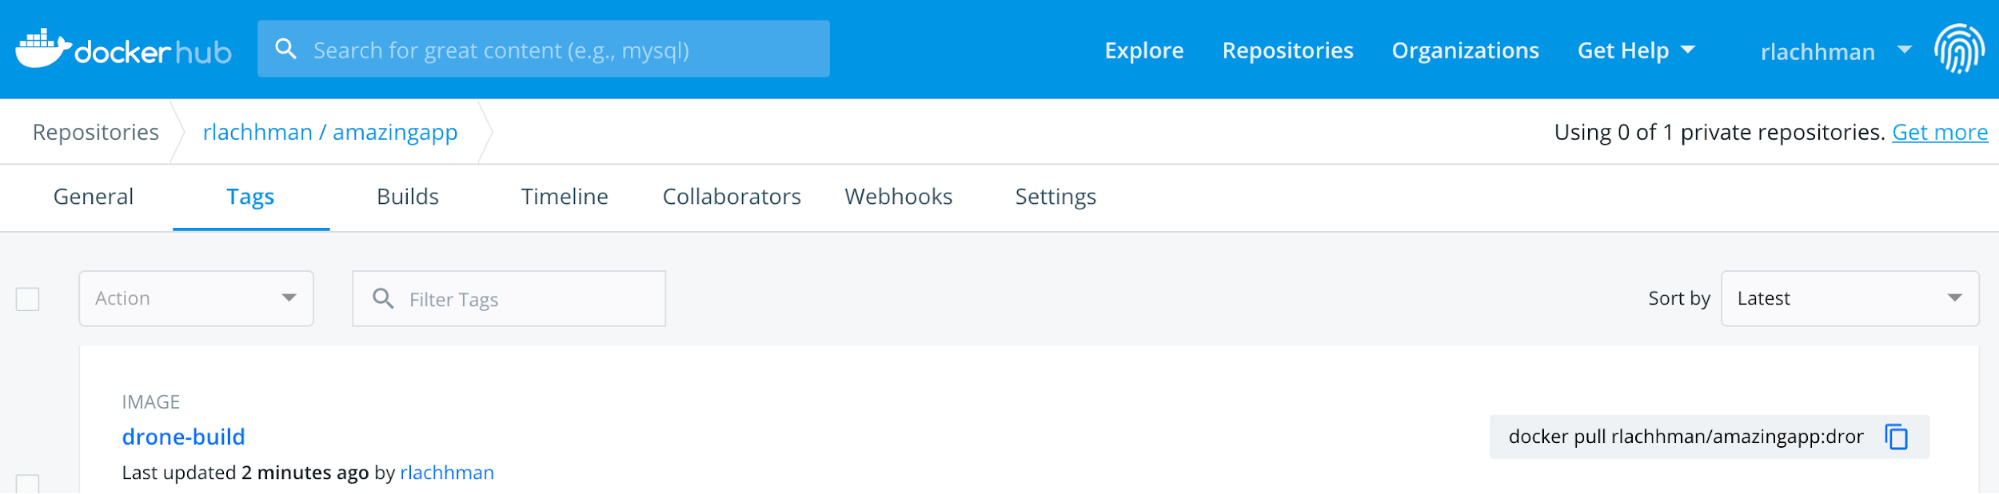
Once the publish step is finished, a new image will be in DockerHub.

Watch the Magic
Within the polling interval, Harness will pick up on the newest build/tag and start deploying on your behalf.
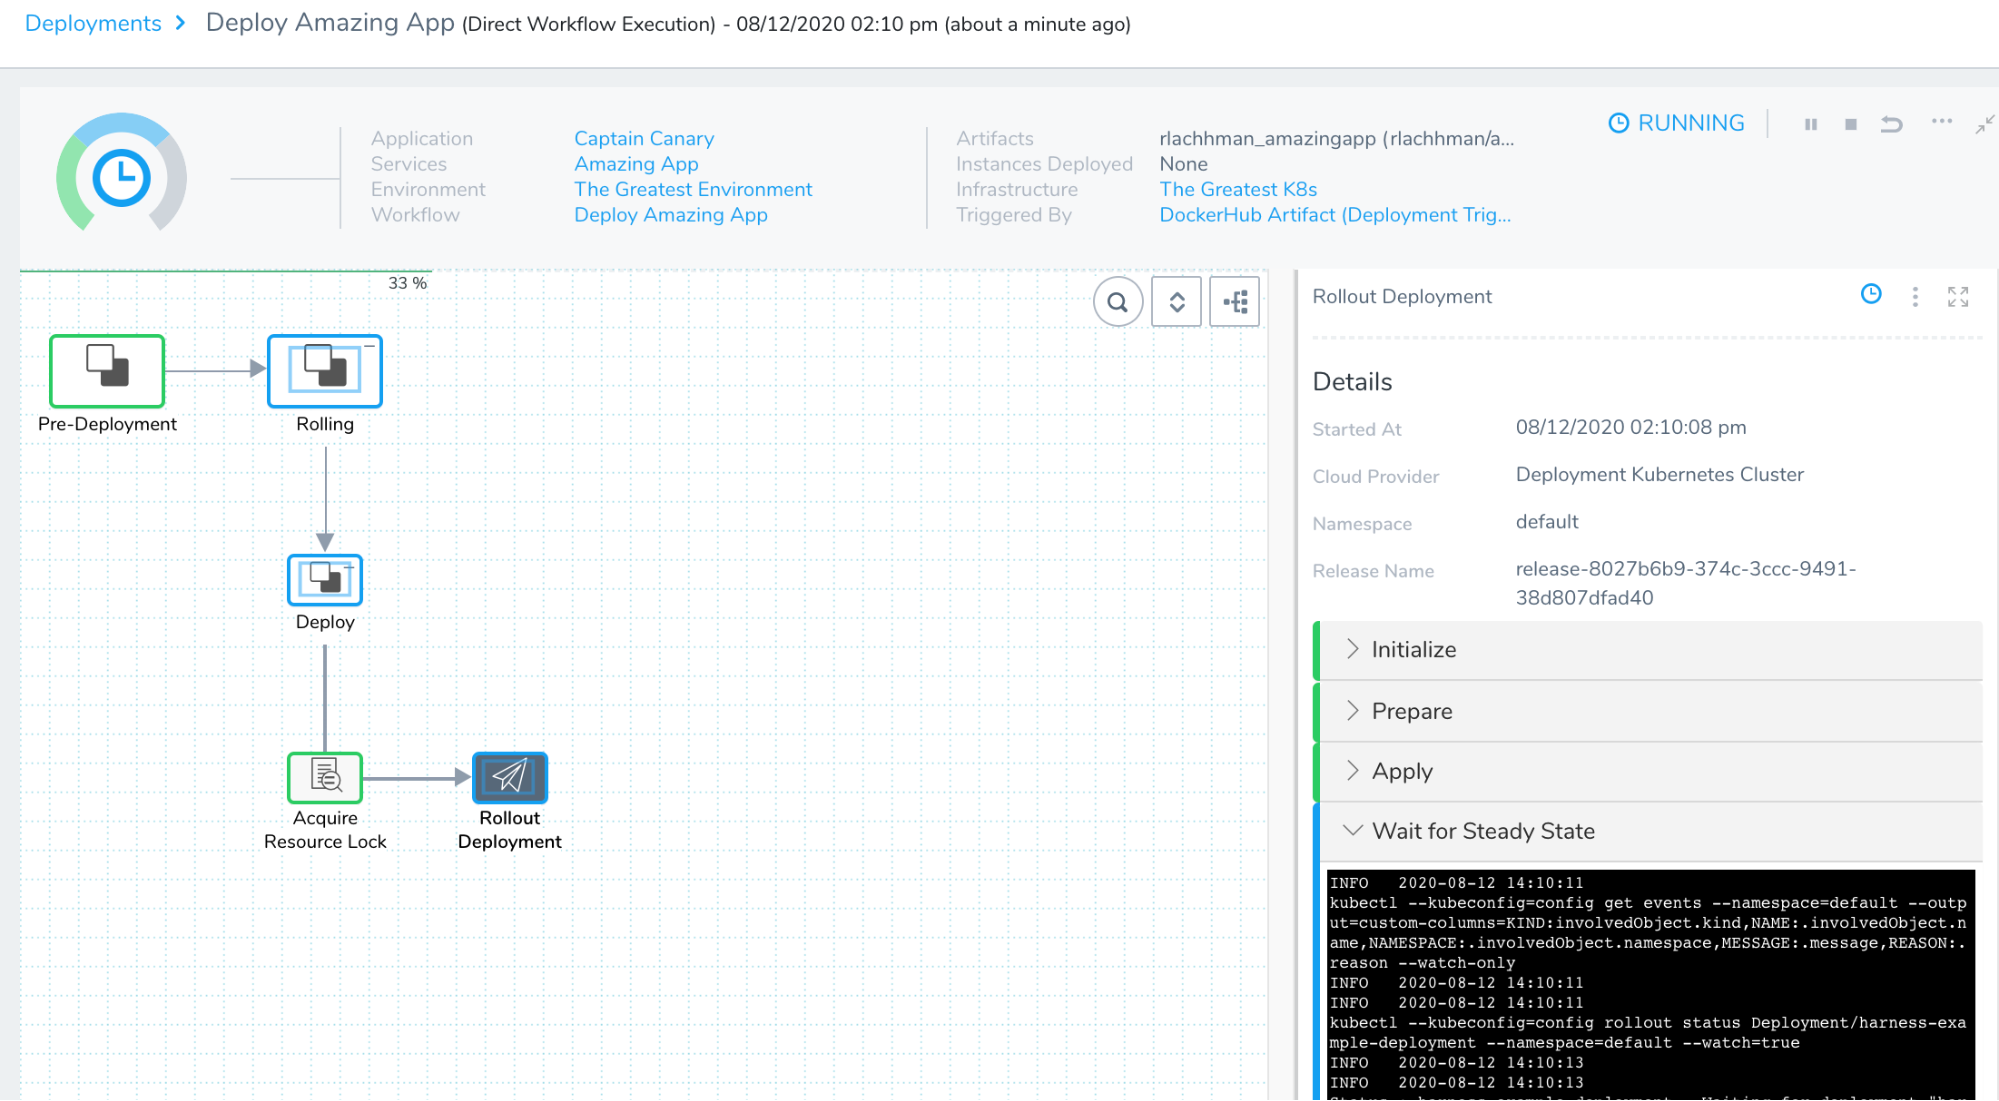
With the Deployment kicked off, you have an end-to-end CI/CD pipeline. From code to production!
Partner with Harness in your CI/CD Journey
No matter where you are in your CI/CD journey, Harness can simplify and scale your capabilities. With the lightweight and convention-based Harness CI / Drone and the power of the Harness Platform, achieving CI/CD nirvana has never been easier. Get started with Harness CI / Drone and sign up for a Harness Account today!
Cheers,
-Ravi