Connect GitHub, let Harness generate your CI pipeline, then build and push a Docker image to DockerHub. No YAML required.

TL;DR
- Connected a GitHub repo and had a working CI pipeline in minutes without writing YAML
- Harness detected Java + Maven and auto-generated build, test, and cache steps
- Added Docker push on top. Full pipeline (build, test, push to DockerHub) ran in just over 3 minutes
Creating your first CI pipeline usually sounds simple until you actually start.
You connect your repository, figure out what stages you need, configure the build steps, set up the runtime, add caching, testing, credentials, and then hope the first run actually works. With AI coding assistants now generating pull requests faster than most teams can review them, the pressure on CI pipelines is only growing. The 2025 Stack Overflow Developer Survey found that 84% of developers now use AI tools in their workflow, with 51% using them daily. Every AI-generated commit still needs a pipeline to validate it.
Let’s say you have a Java Maven project that needs a CI pipeline. Here is what the setup looks like in Harness.
This walkthrough is for developers or platform engineers setting up their first Harness CI pipeline. You need a Harness account (free tier), a GitHub repository with buildable code, a Dockerfile in that repository (the Docker push step builds from it), and a DockerHub account if you want to follow the push step. I used my ci-intelligence-lab repo, a Java Maven project with 42 unit tests and a working Dockerfile already in the root.
So I started with one simple goal:
Connect my repository, create a working CI pipeline, and then take it one step further by building and pushing the image to DockerHub.
And honestly, most of the work ended up happening for me.
End result: the pipeline itself ran in just over 3 minutes, build, test, and push to DockerHub, without writing a line of pipeline YAML.
YAML from scratch vs auto-generated
You can write the pipeline YAML from scratch: pick your container images, define your build and test commands, configure caching, add the Docker push step, and wire up connectors. If you already know Harness well, that works.
The other option is to let the Harness agent scan the repository and generate the pipeline for you. You review what it creates, run it, and then modify from there.
In this blog post, we’ll discuss the second option. I wanted a working pipeline first, not a perfect one.
Starting with a build pipeline
The first screen keeps things straightforward.
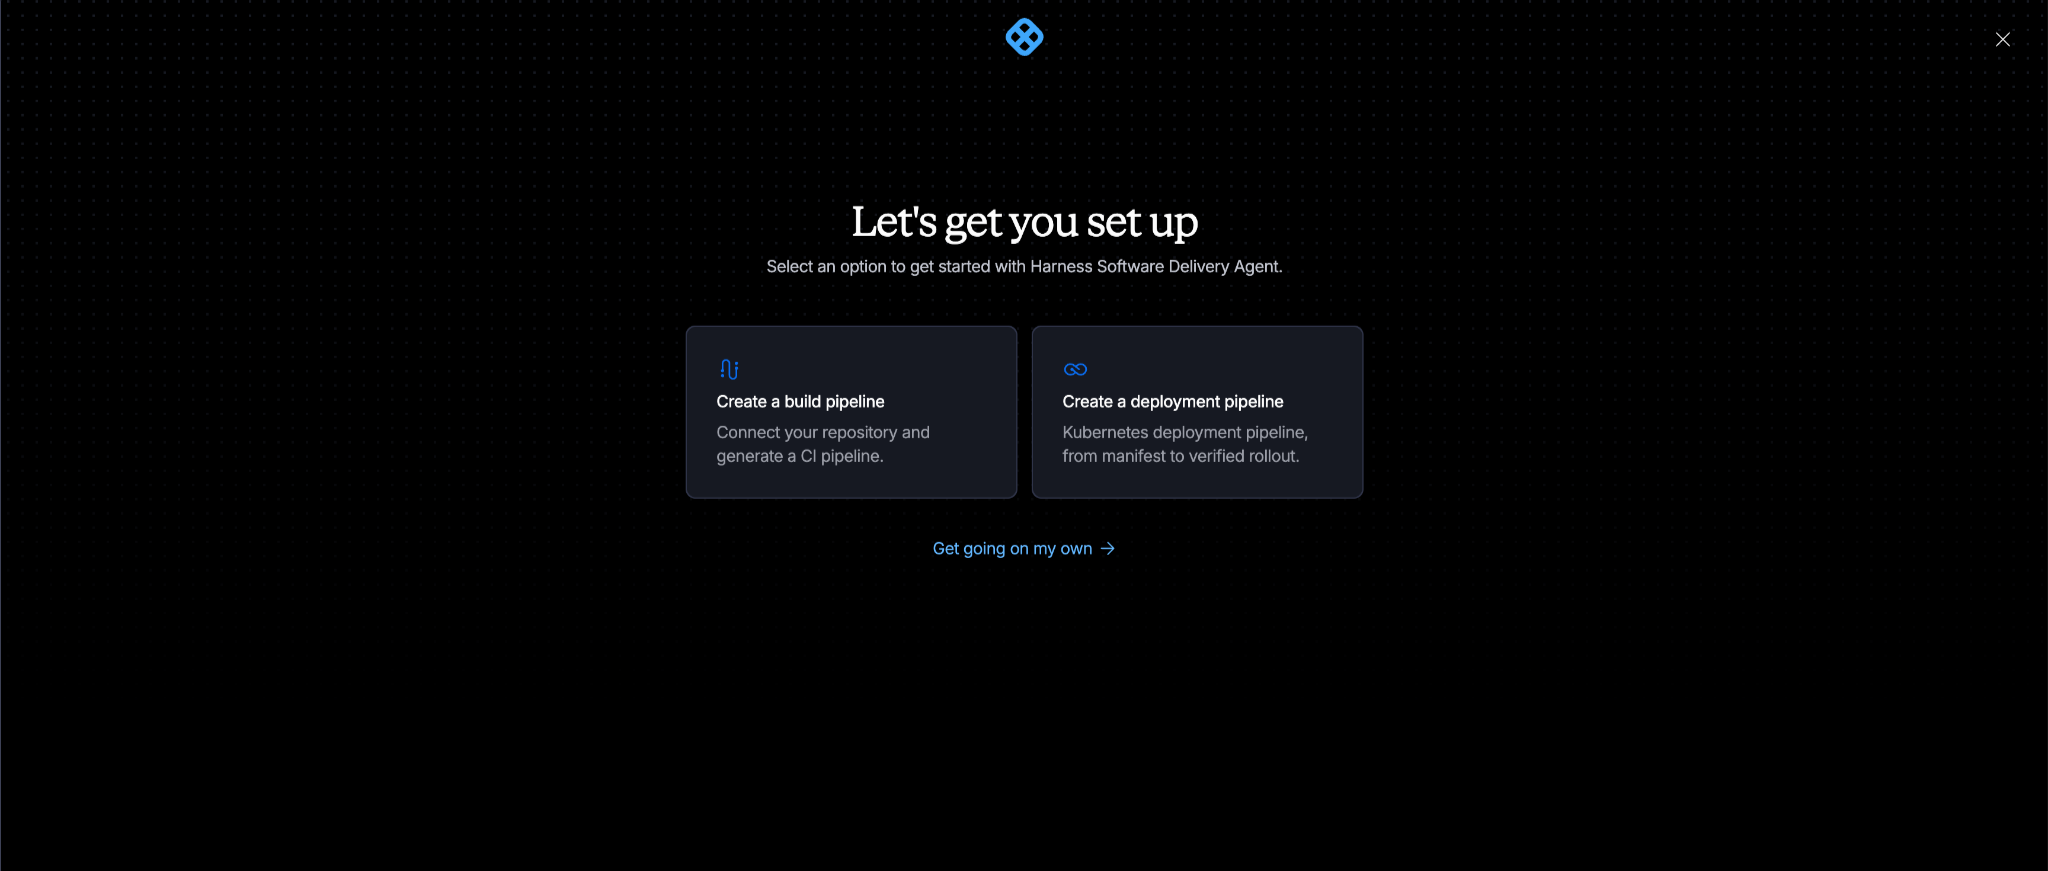
The Harness agent asks what you want to do:
- Create a build pipeline
- Create a deployment pipeline
- Get going on your own
Since I was trying out CI, I selected Create a build pipeline.
The next screen explains what is about to happen.
The Harness agent will scan the repository, determine the stages and steps it needs, generate the pipeline, and store the YAML inside the .harness directory of the repository.
There is also an option to build everything manually.
I just clicked Let's go.
Connecting the repository
The first real step is selecting where the source code lives.
Harness gives you multiple options here, including Harness Code, GitHub, GitLab, and Bitbucket.
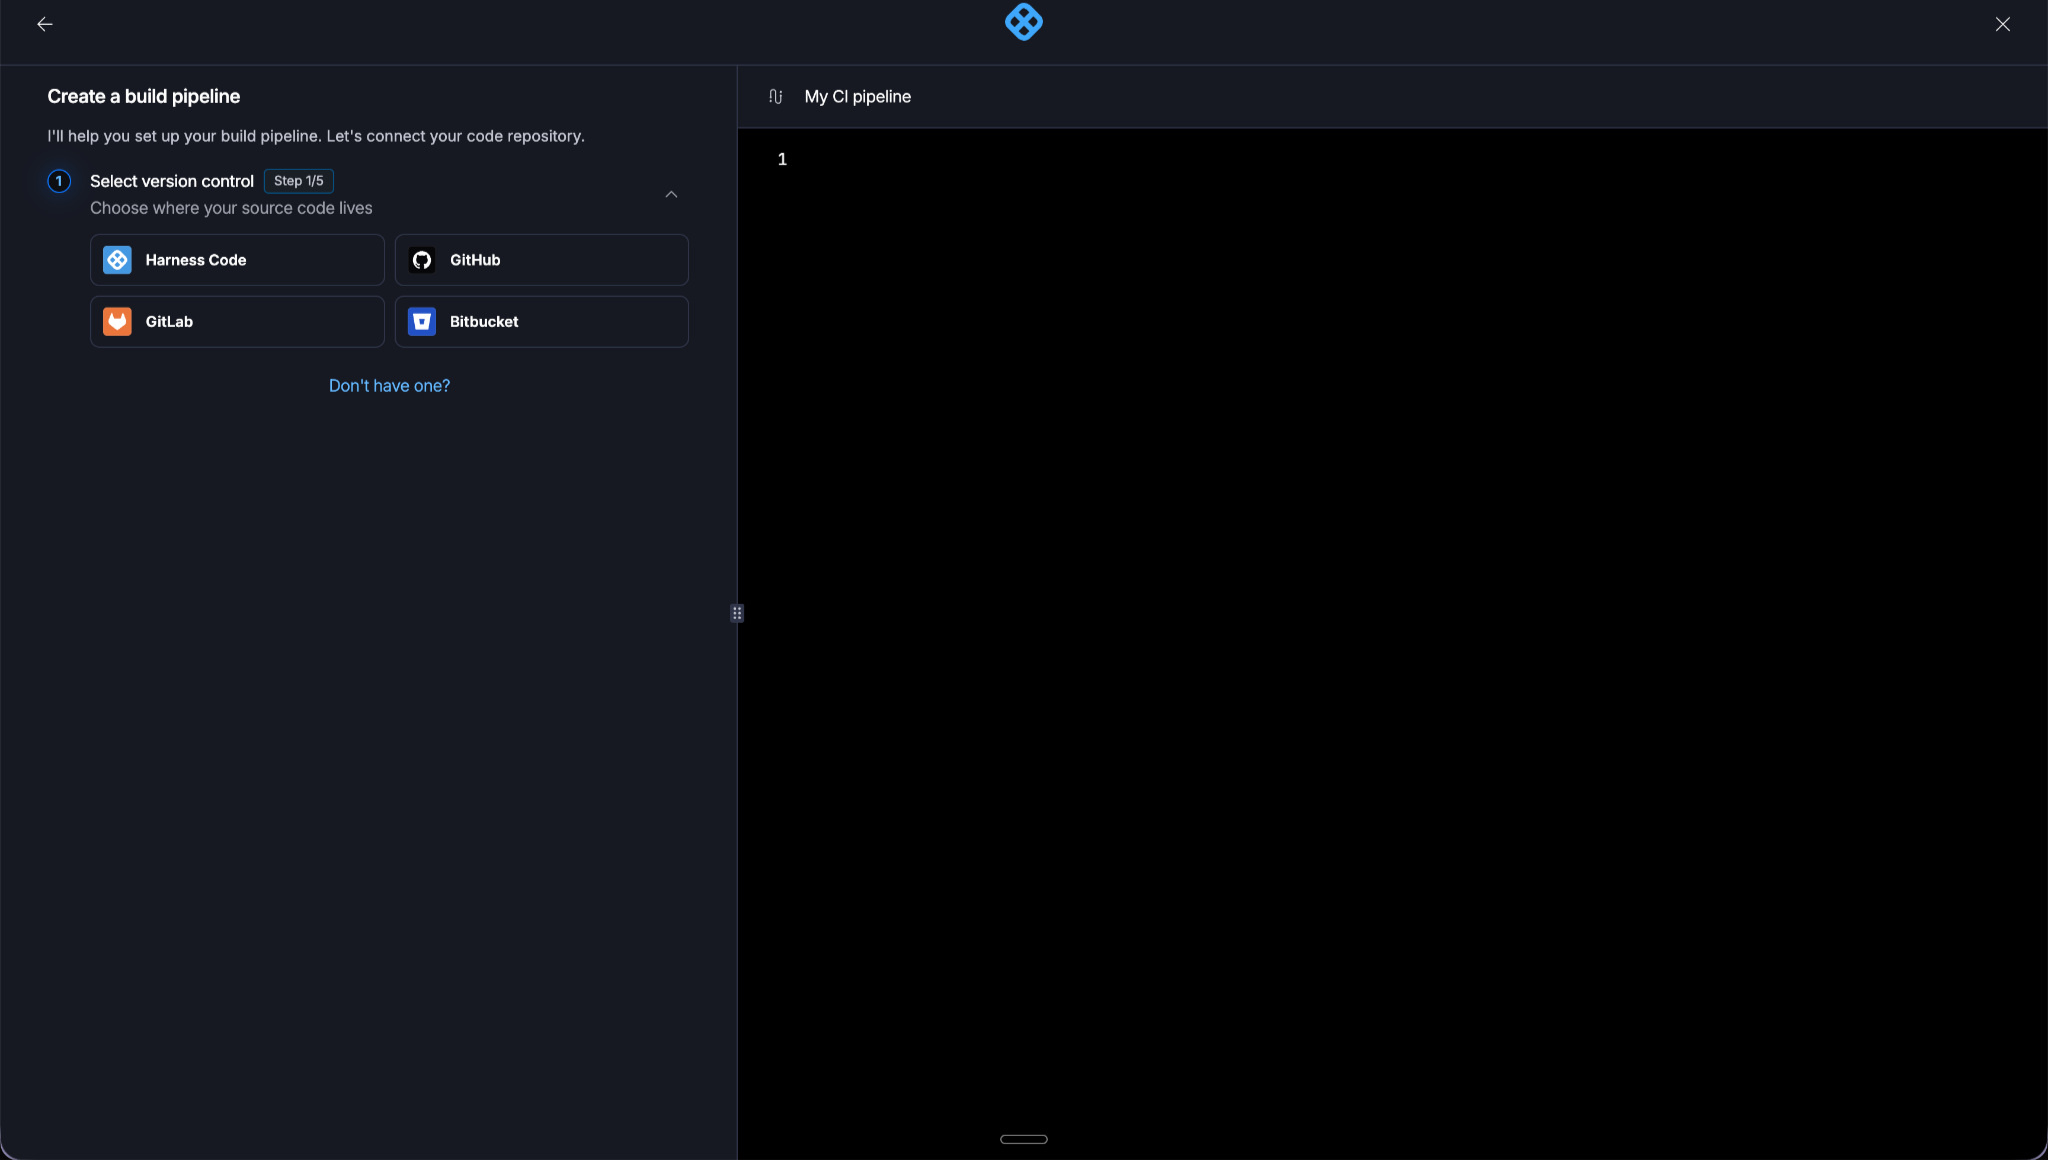
I use GitHub, so I selected GitHub.
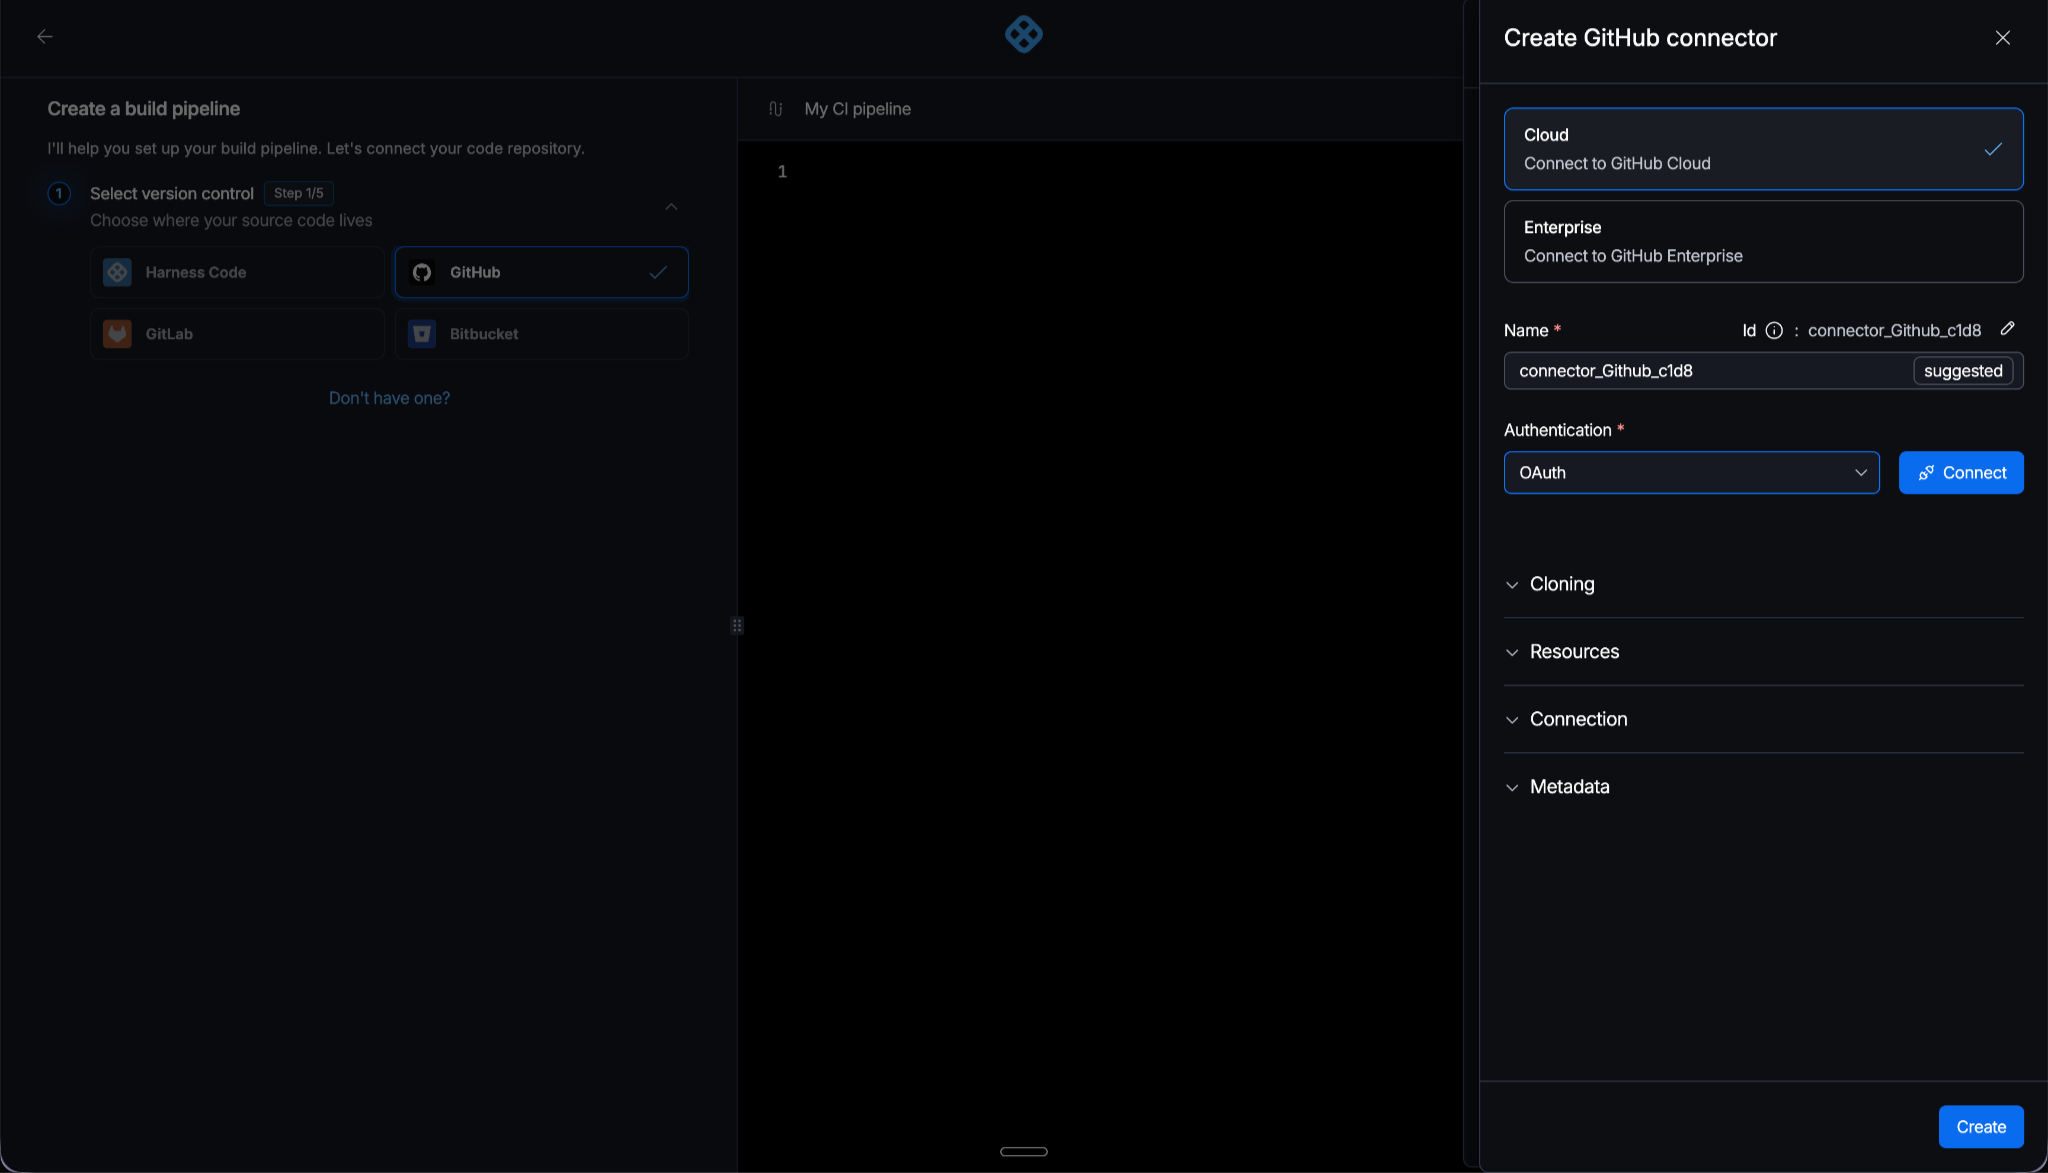
From there, Harness gave me another simple choice.
I could either use an existing connector or create a new one. I created a new one.
For GitHub Cloud, OAuth was already available as the authentication option. I clicked Connect, authorized Harness through GitHub, and that was basically it.
No copying tokens around. No manually setting up a bunch of authentication fields.
Once the connector was ready, Harness could access my repositories.
I selected the repository I wanted to build from and moved on. If you have dozens of repositories, you may need to scroll to find yours.
This is where Harness started doing the work
After selecting the repository, there was not much left for me to configure.
The Harness agent started checking connectivity, cloning the default branch, indexing the files, detecting the languages, and analyzing the repository.
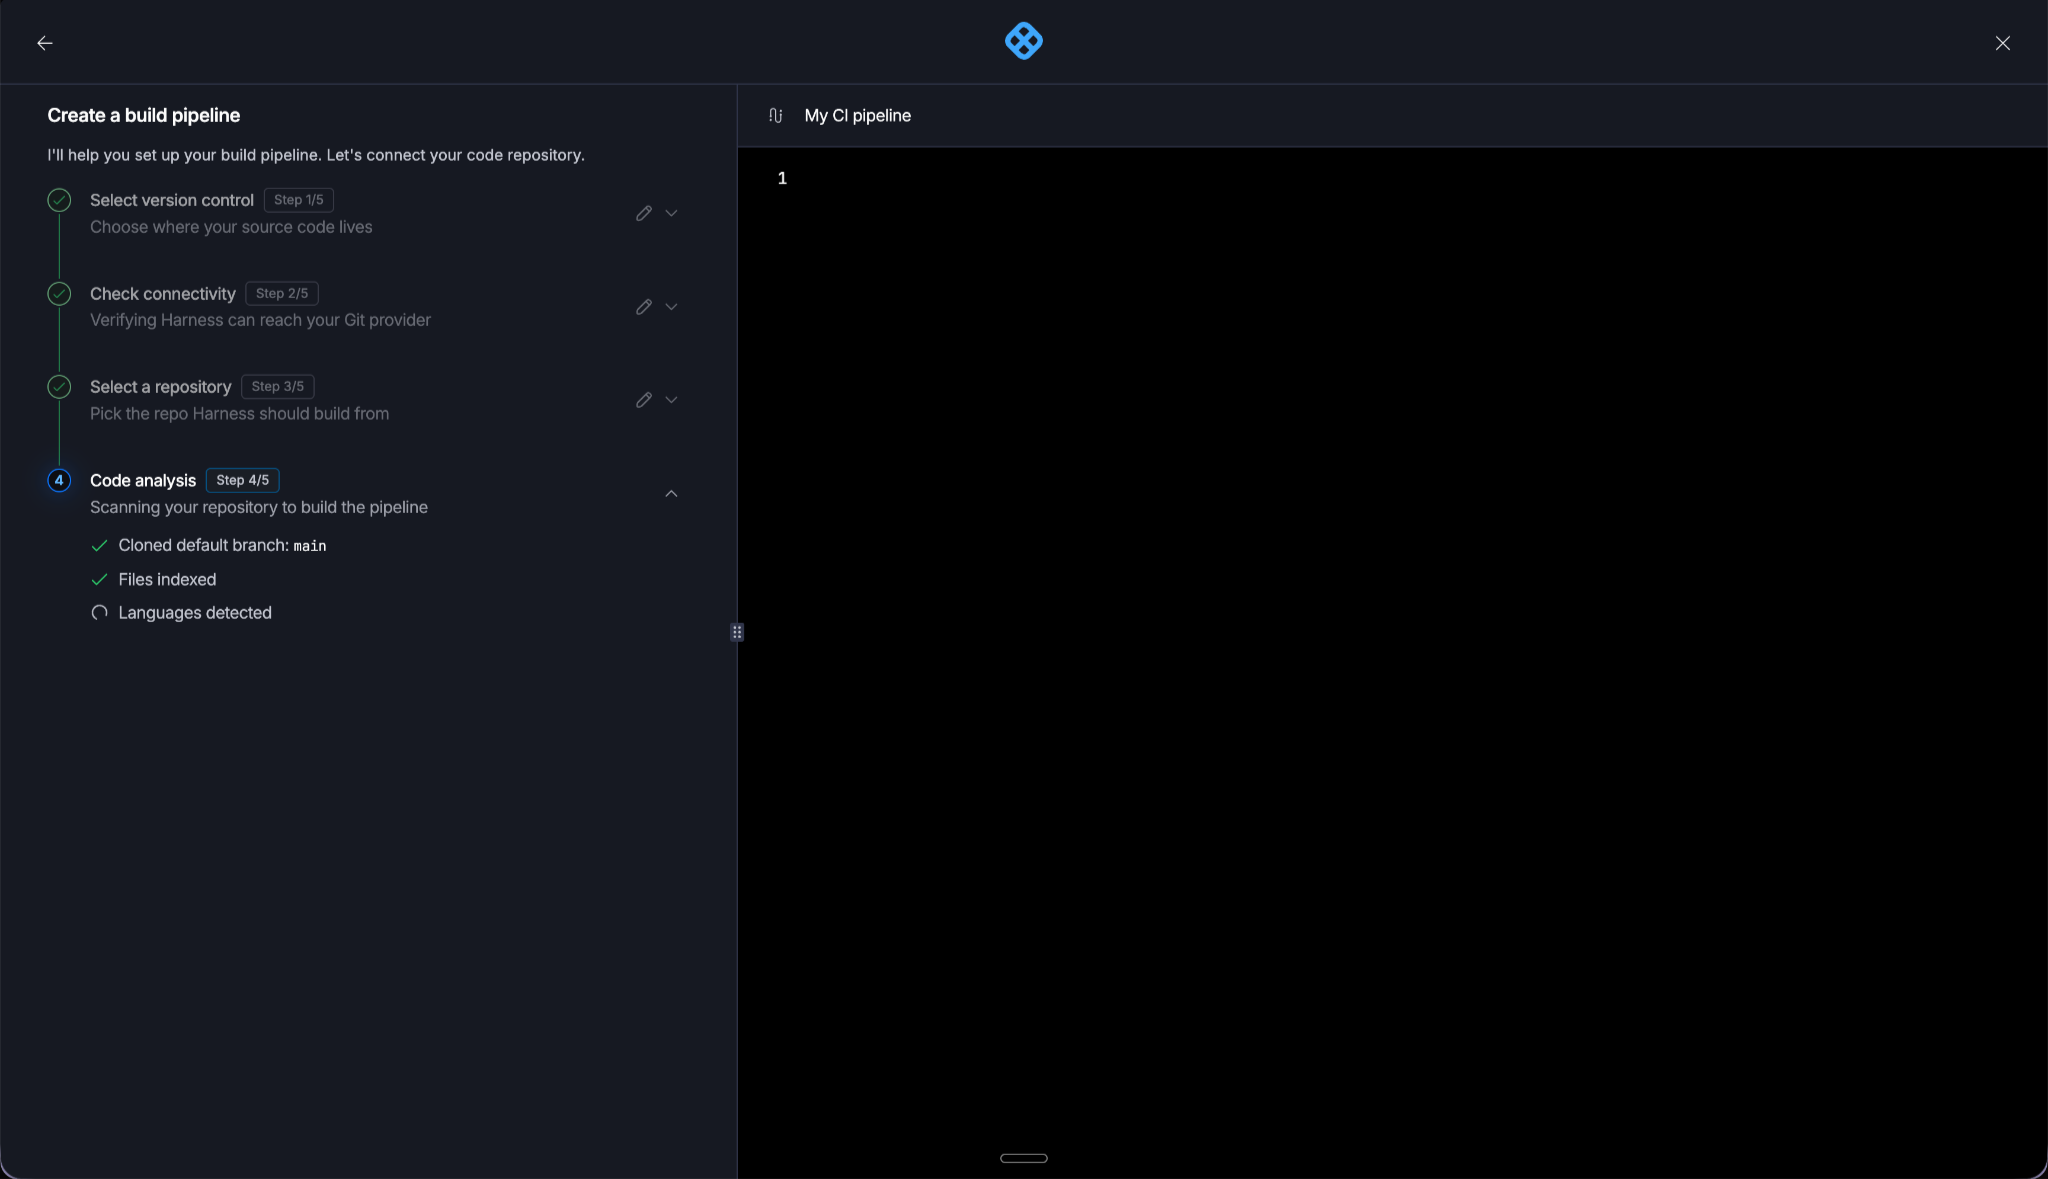
Then it started generating the pipeline YAML. This is where the AI part actually started making sense to me. It was not just an AI button sitting somewhere in the product. The agent was actually looking at my codebase and using that information to put together the pipeline. I was not manually deciding which build image to use, what build command I needed, how the test step should look, or how the basic CI stage should be structured. The agent was putting that together for me.
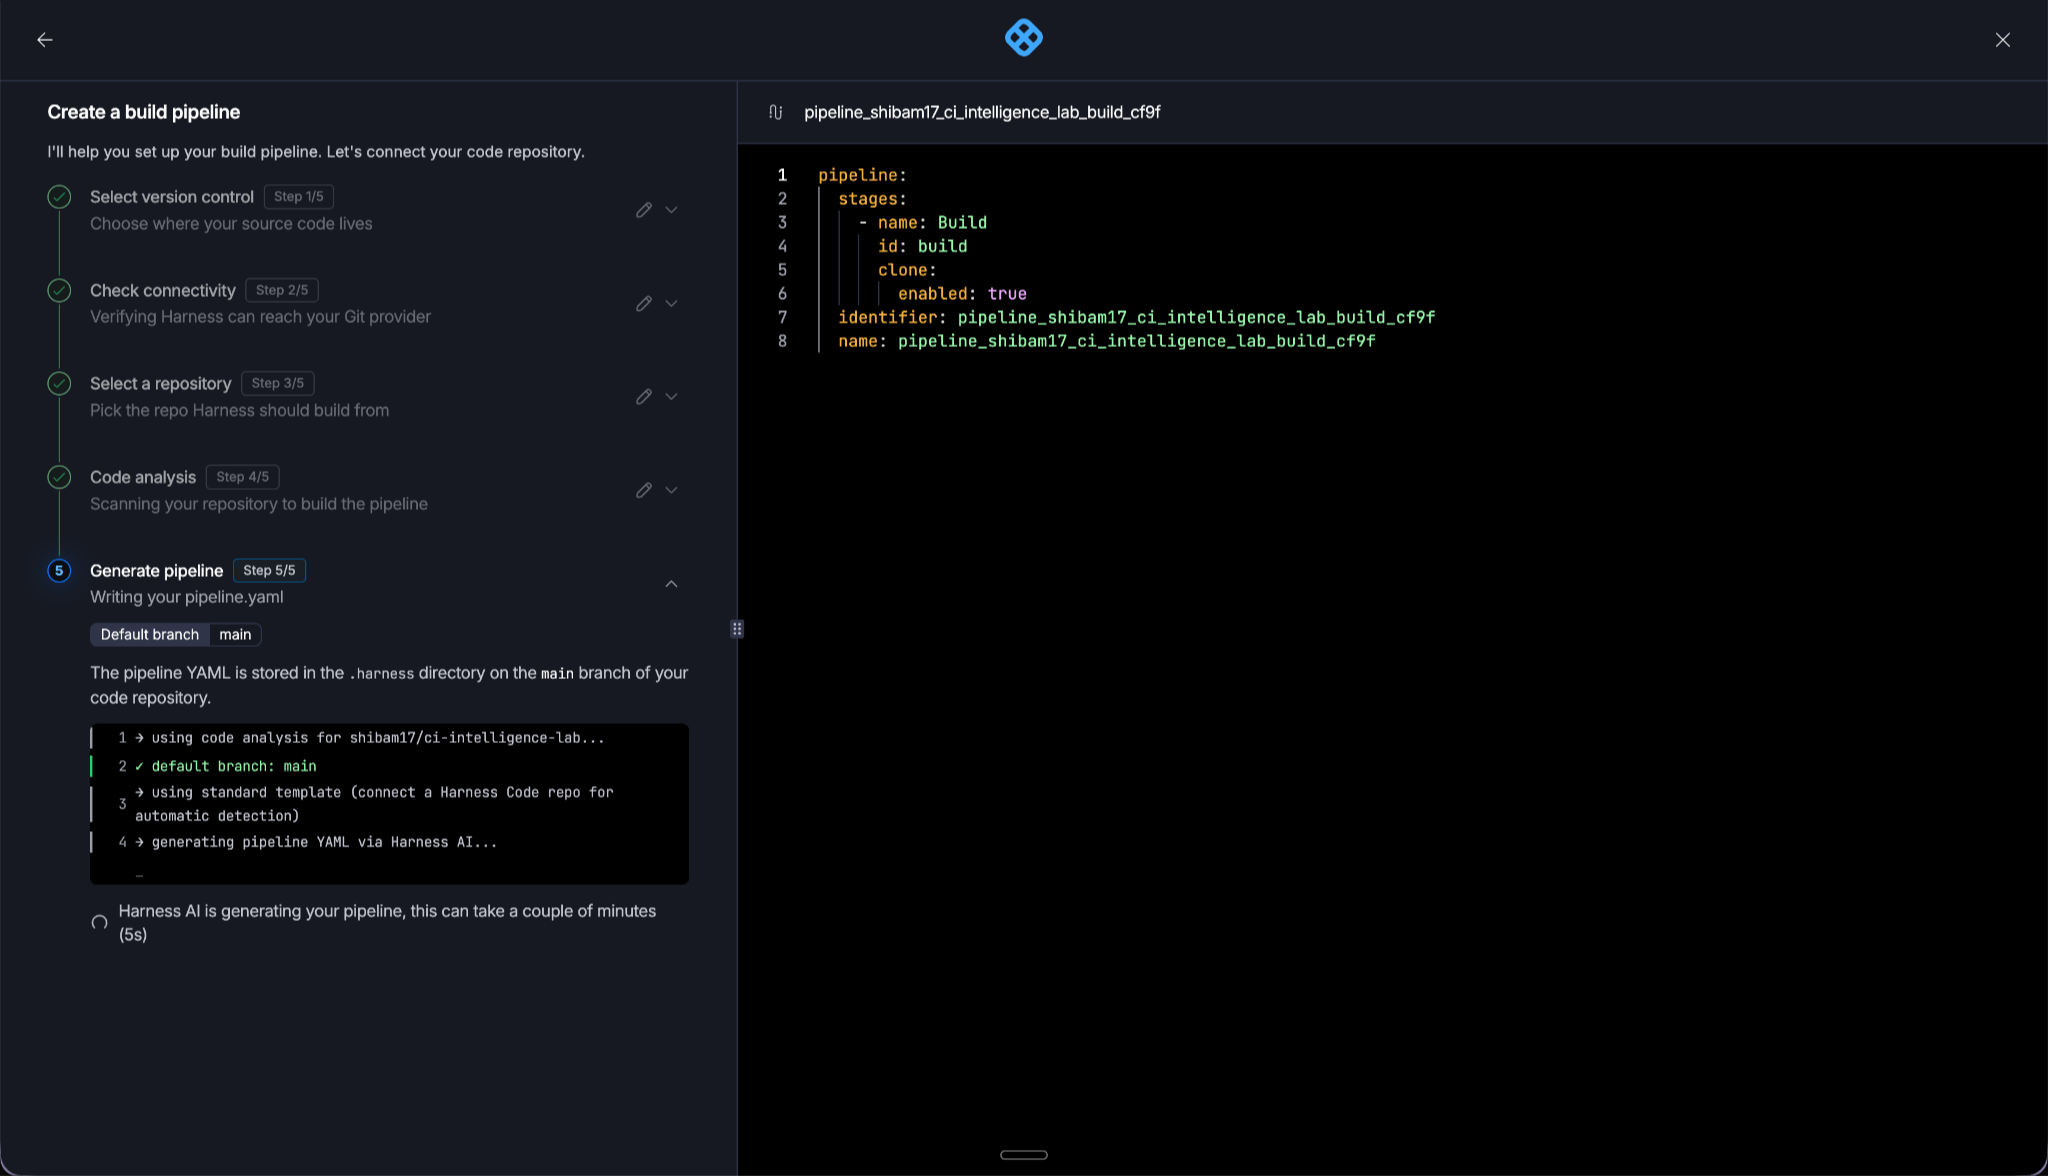
Within a short while, the pipeline was created. Harness asked whether I wanted to start my first build. Of course, I clicked Let's go. You generated the pipeline for me, now let's see if it actually works.
The first run actually passed
The pipeline started running immediately.
I could see Harness going through the generated steps:
- Initialize
- Clone the codebase
- Set up Build Intelligence
- Restore the cache
- Build
- Test
- Save the cache
And then everything turned green.
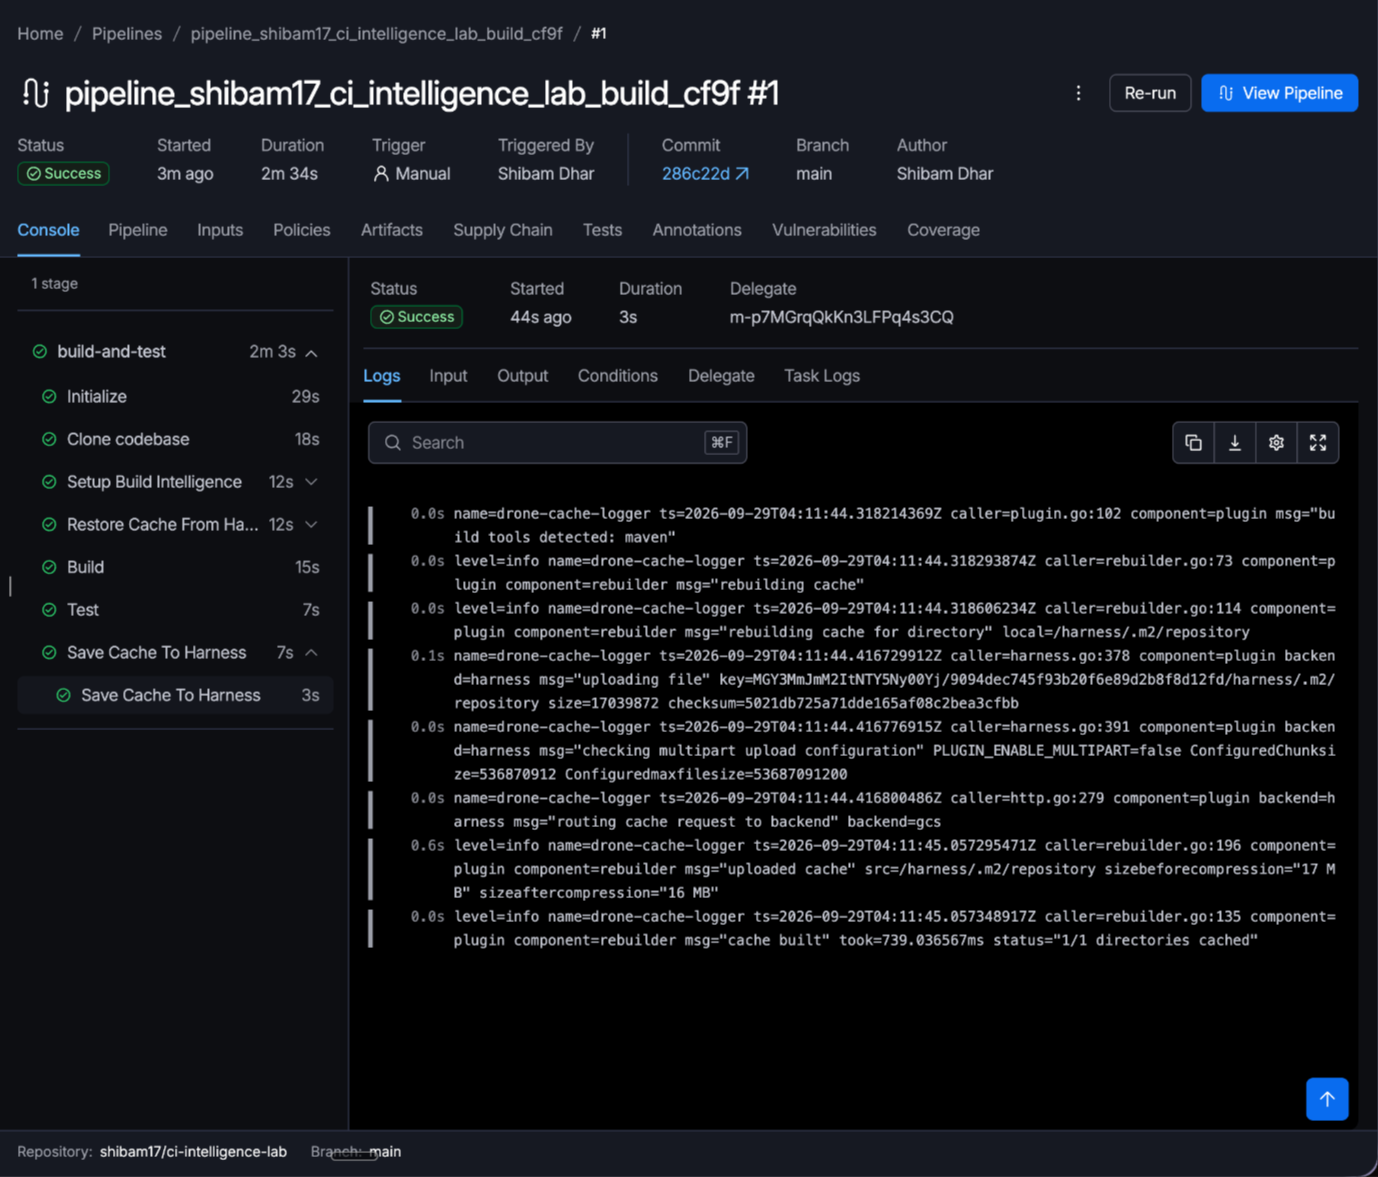
The full run took 2 minutes and 34 seconds. 42 tests passed.
That was probably the point where the whole onboarding flow clicked for me.
I had essentially given the agent access to the repository, selected the codebase, let it analyze its contents, and then ran the pipeline it created.
And the first run passed.
No manual pipeline assembly before getting to that point.
That is a solid starting point, but I wanted to make the pipeline more real.
Building and testing are useful, but I also wanted the image to actually go somewhere.
So next, I decided to build and push it to DockerHub.
Adding Build and Push to Docker
Inside the pipeline editor, I clicked the + button to add another step.
I searched for Docker.
The agent immediately showed several Docker-related options, including Build and Push Docker.
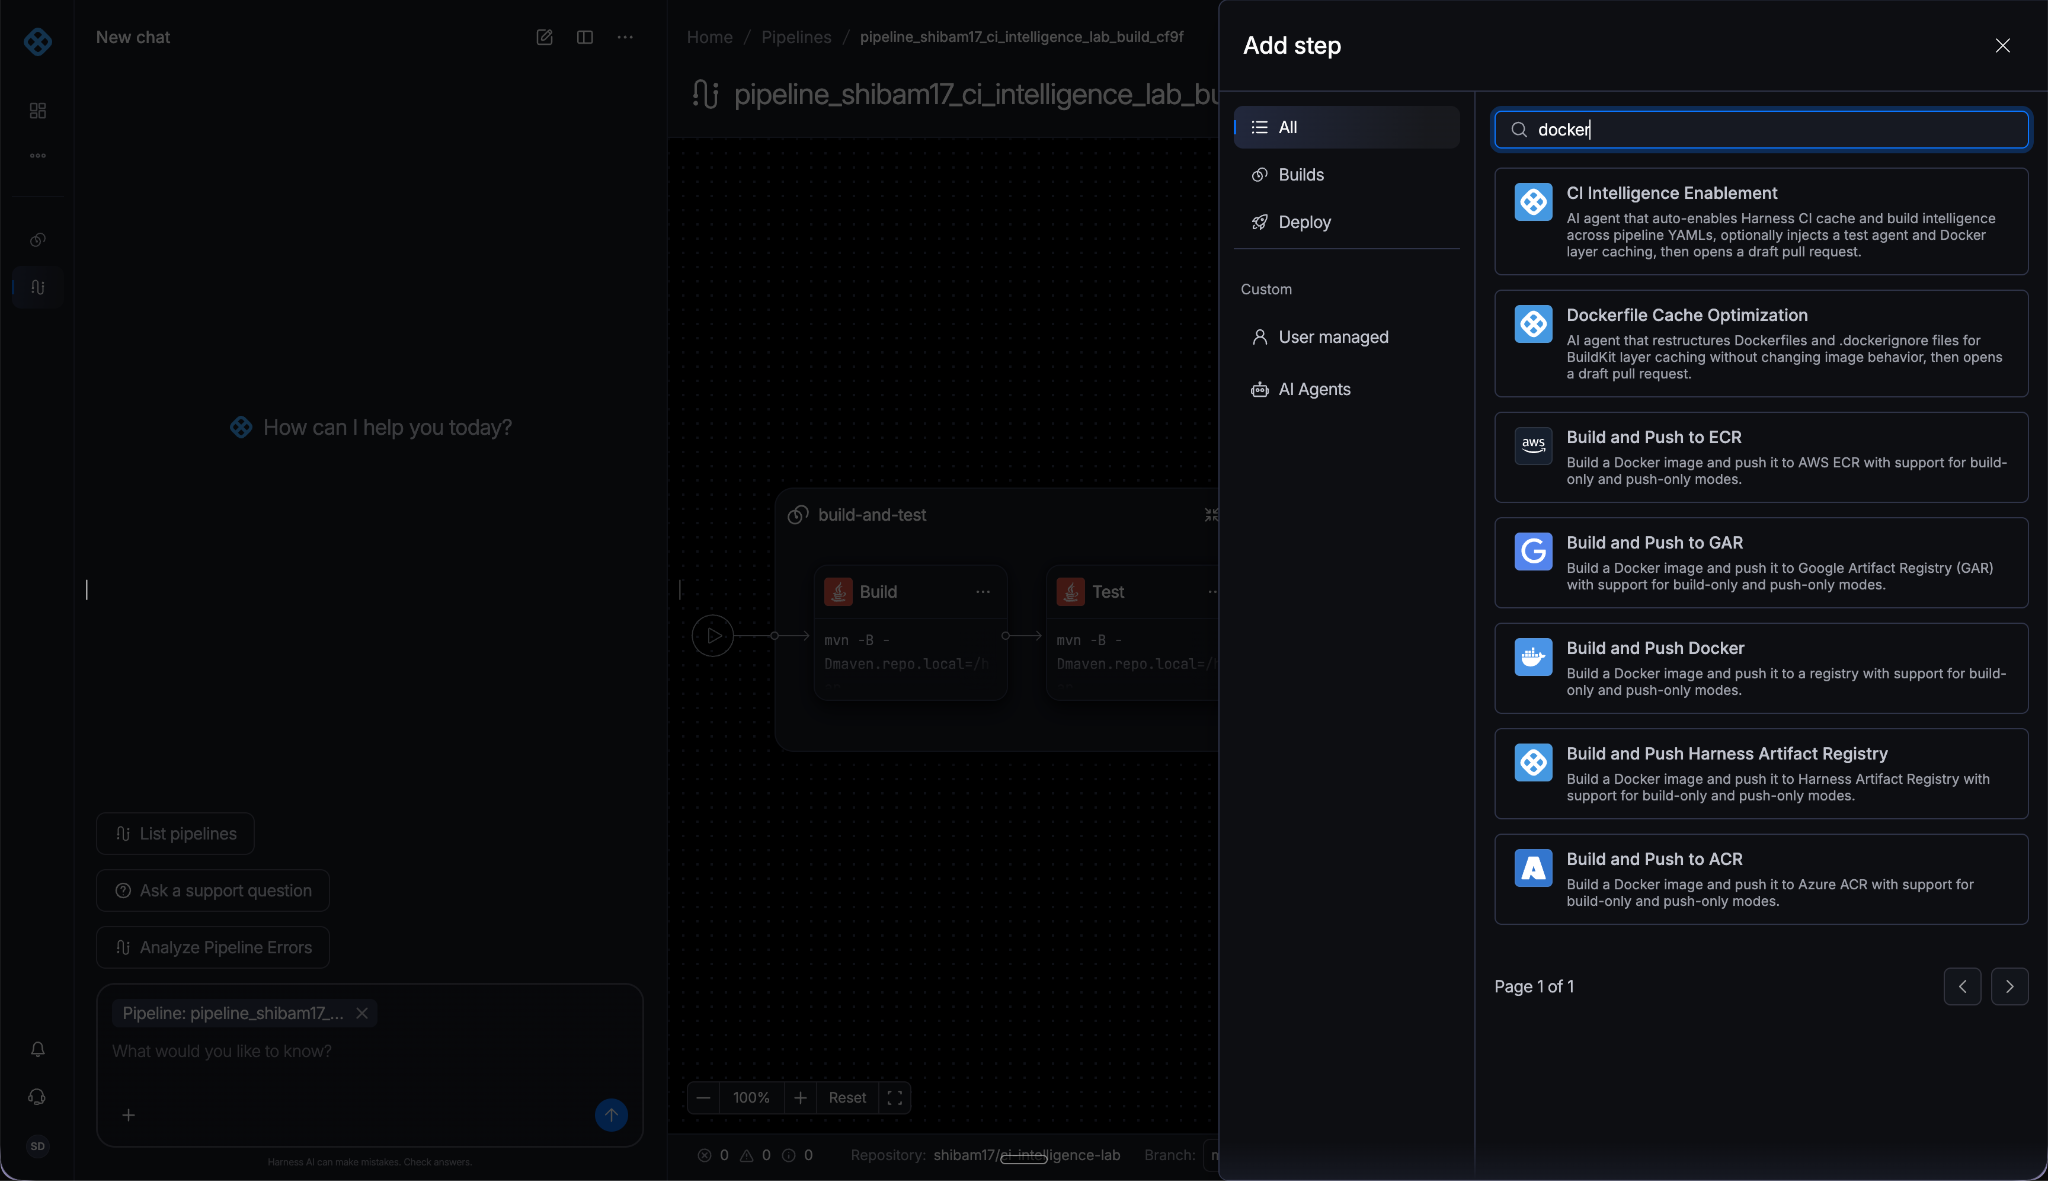
I selected it and, once again, the agent gave me the option to use an existing connector or create a new one.
I created a new Docker connector.
For DockerHub, the connector setup was straightforward: select DockerHub as the provider, enter the credentials, and done.
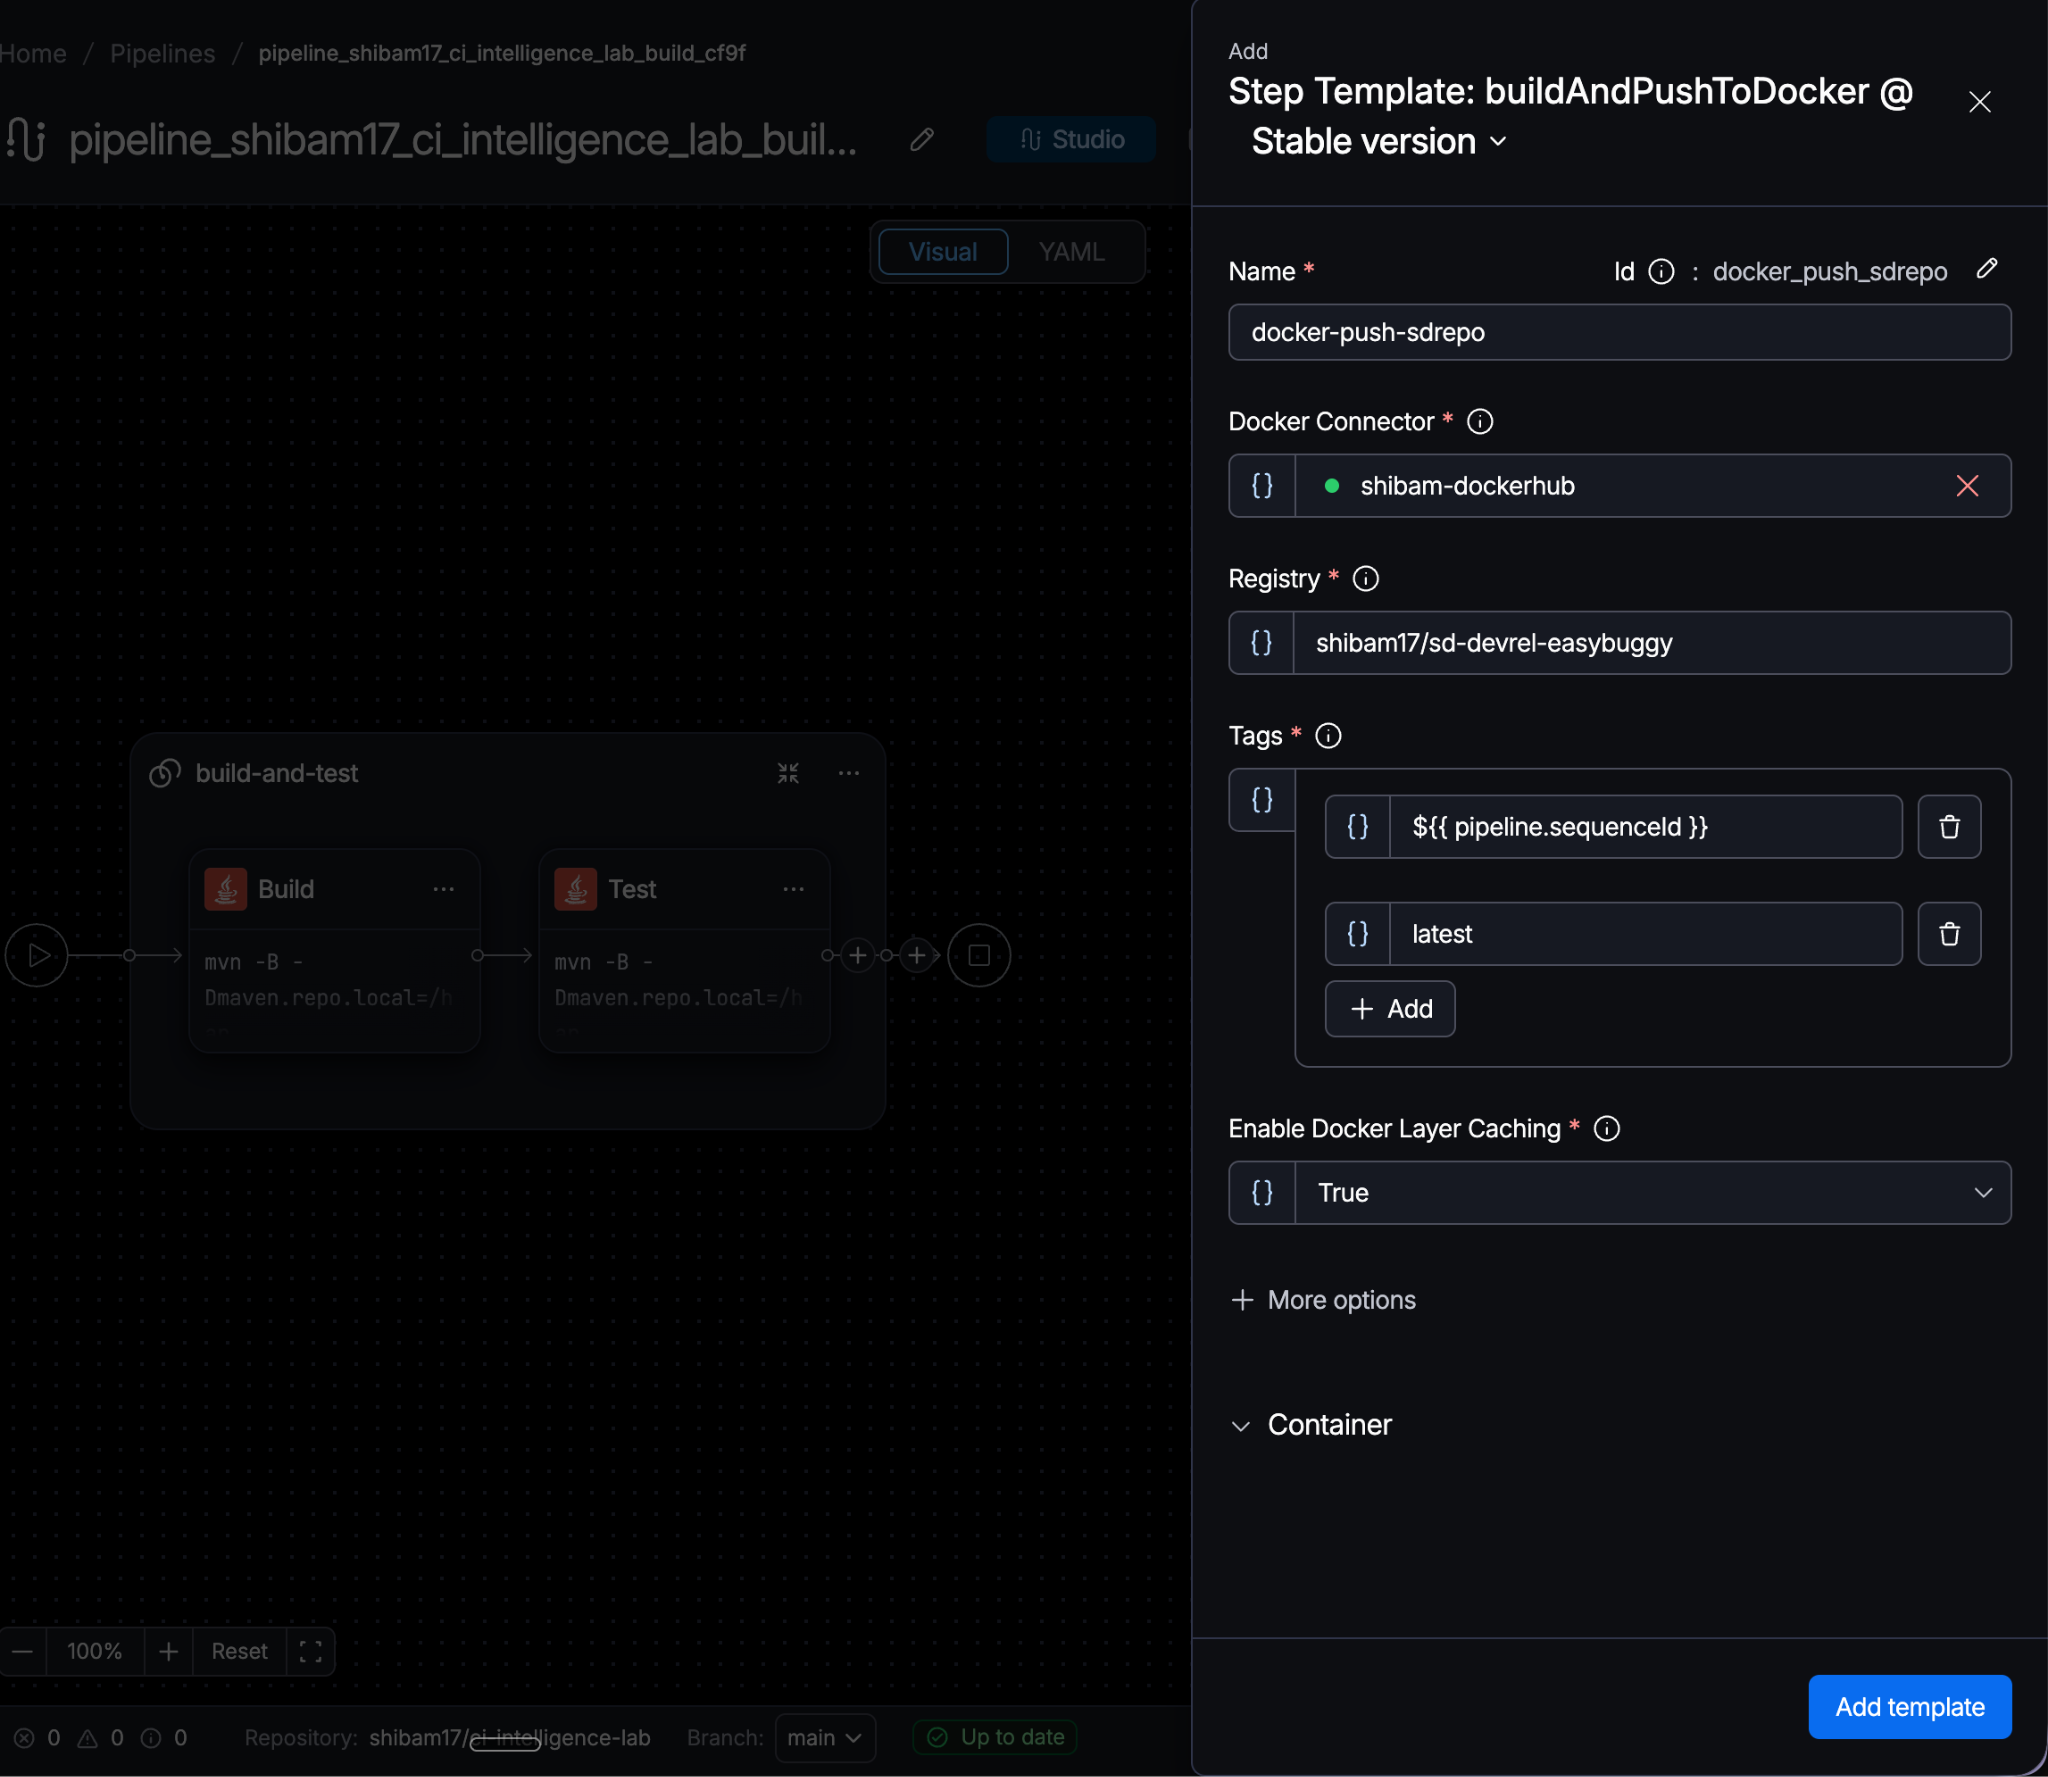
Once the connector was available, I selected it in the Build and Push Docker step.
Then I configured the repository I wanted to push to.
For the image tags, I used the pipeline sequence ID and also added latest.
I also kept Docker layer caching enabled.
Build, test, push
I ran the pipeline again. This time, it went through the original CI steps and then continued into the Docker push step.
Clone → Build → Test → Build and Push Docker → Save Cache
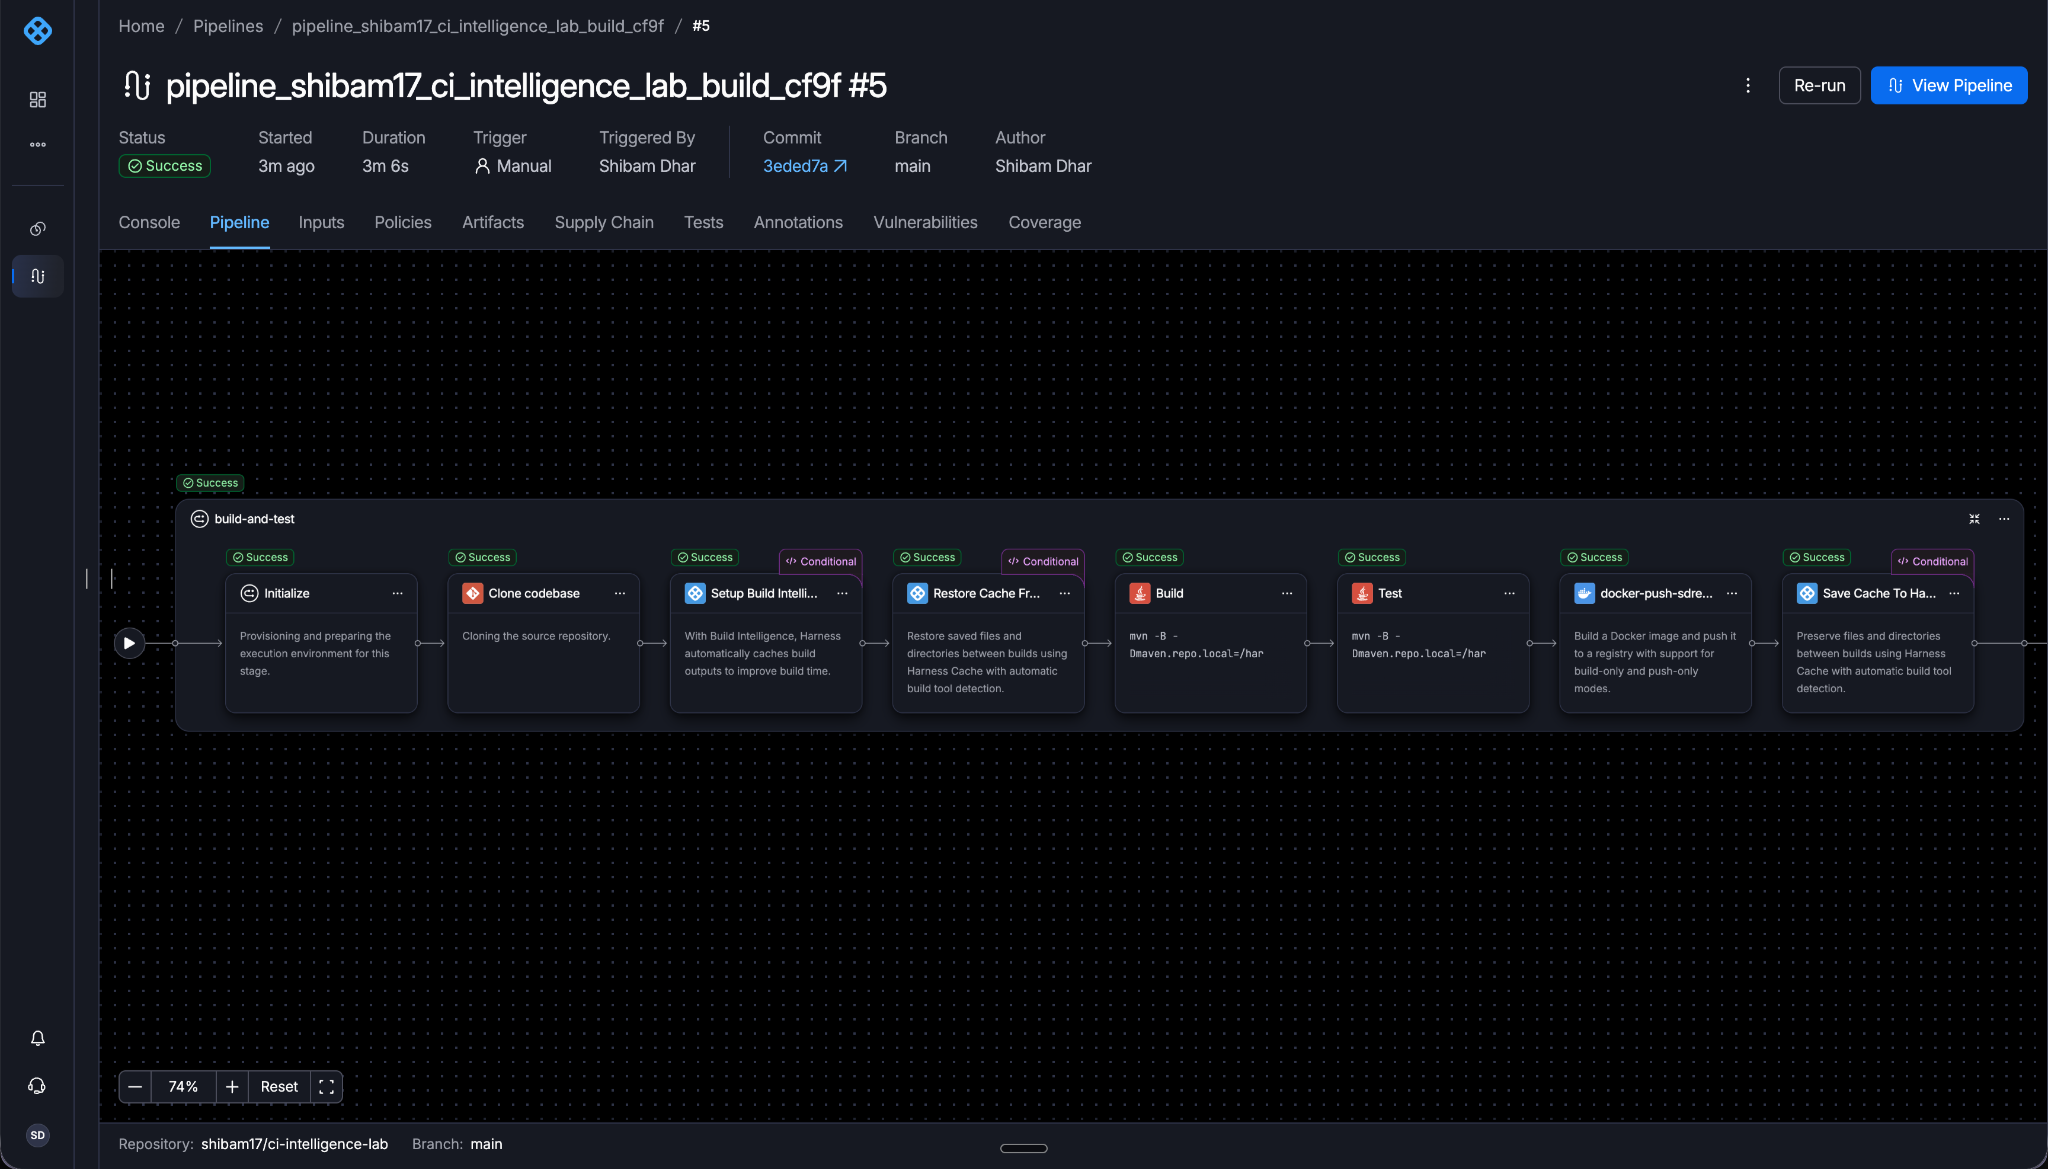
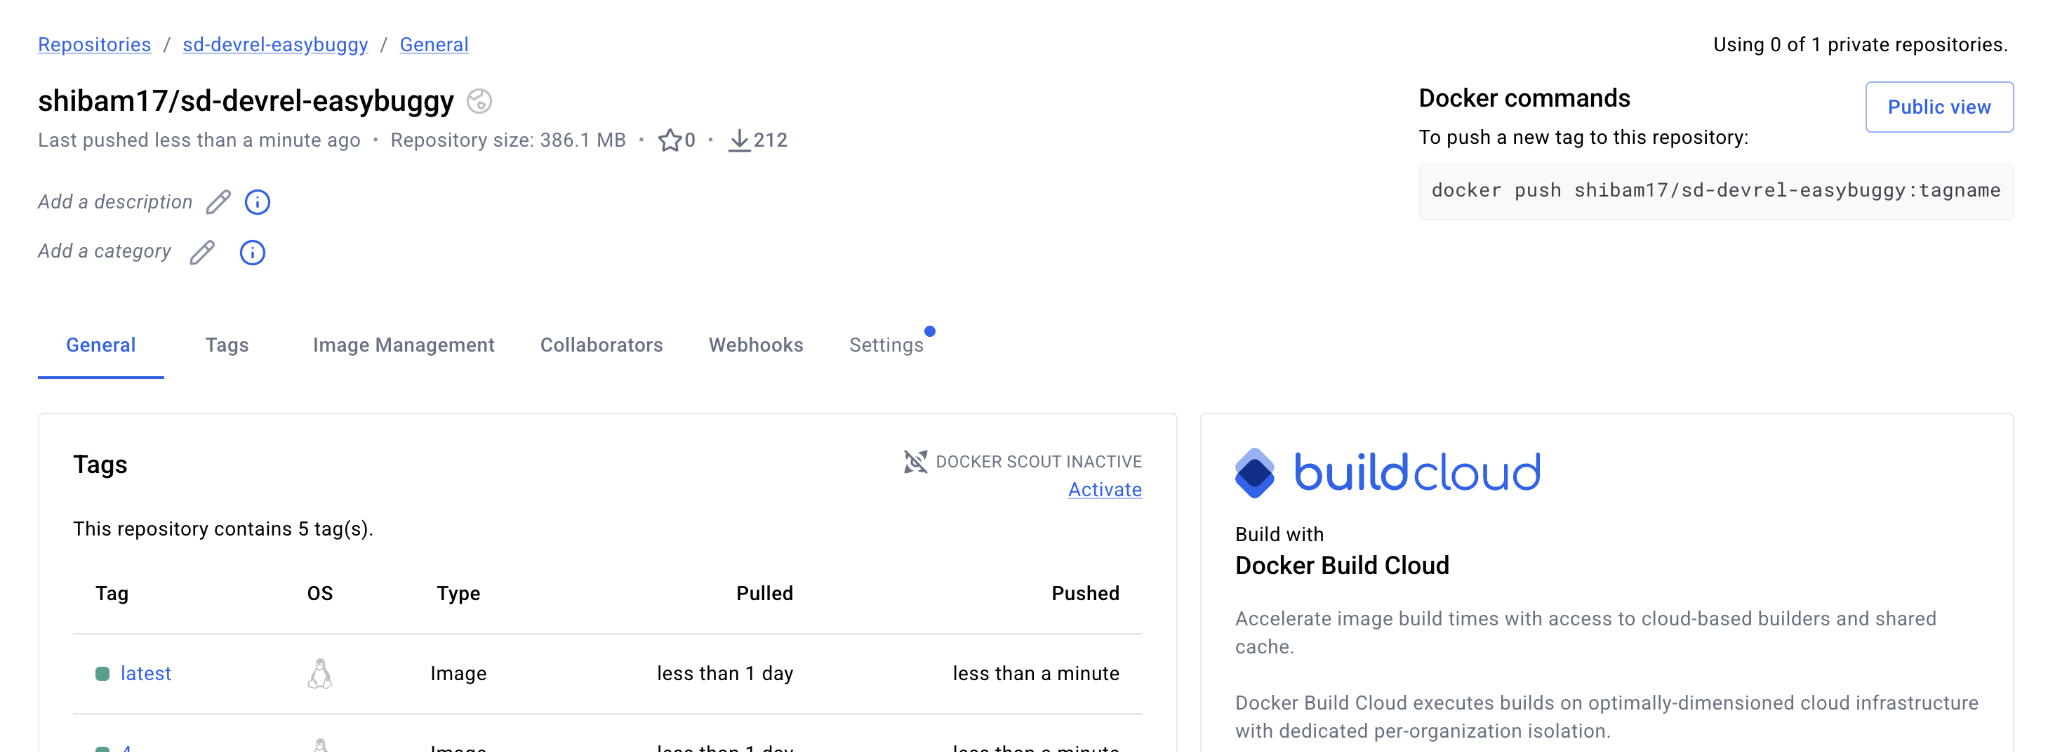
The pipeline passed, but I wanted to confirm outside of Harness. I opened DockerHub, and the newly pushed image was there, including the latest tag and the tag from the pipeline run.
This time, the full pipeline, including the Docker push, finished in 3 minutes and 6 seconds. The Docker step itself took 47 seconds.
So the end state: code in GitHub, a CI pipeline that builds and tests it, and the resulting image pushed to DockerHub. One extra step on top of what Harness generated.
What I configured vs what the Harness agent handled
Here is the split:
What I Did
- Connected my GitHub account (OAuth)
- Selected the repository
- Clicked "Let's go"
- Added the Docker push step
- Created the DockerHub connector
- Set the image tags
What the Harness Agent Did
- Detected Java + Maven from the repo
- Chose the container image (maven:3.9-eclipse-temurin-17)
- Generated the build and test steps
- Configured Cache Intelligence and Build Intelligence
- Set up test reporting with JUnit XML paths
- Structured the stage, clone, and runtime config
Six decisions on my side. Six things I did not have to figure out.
If I had written this pipeline from scratch, I would have needed to know which Maven image version to use, how Harness structures its YAML stages, where to put the cache config, and how to format the test report paths. Instead, I started with a working baseline and added the Docker push step on top.
That difference matters. Starting with a blank pipeline means you have to understand the product before you can get value from it. Here, the order was reversed: get something running, then customize.
And if your team is using AI coding assistants, every one of those AI-generated PRs still needs to pass through a pipeline like this before it ships. The faster you can stand one up, the less it bottlenecks the rest of the delivery chain.
The Harness agent uses Test Intelligence to skip tests not affected by your code change, and Cache Intelligence automatically handles dependency caching (yours is already enabled in the generated pipeline). If you want to see how those features perform at scale, Harness CI benchmarks show up to 4x faster builds with both enabled. I will walk through both of those in a follow-up post. The Harness CI documentation covers advanced Docker push options, including multi-architecture builds and custom Dockerfile paths.
Here is the pipeline YAML that Harness generated and that I extended with the Docker push step:
pipeline:
  name: pipeline_shibam17_ci_intelligence_lab_build_cf9f
  clone:
    enabled: true
  stages:
    - id: build_and_test
      name: build-and-test
      runtime: cloud
      clone:
        enabled: true
      cache:
        enabled: true
      build-intelligence:
        enabled: true
      steps:
        - id: build
          name: Build
          run:
            container:
              image: maven:3.9-eclipse-temurin-17
            shell: bash
            script: mvn -B -Dmaven.repo.local=/harness/.m2/repository -DskipTests clean compile
        - id: test
          name: Test
          run:
            container:
              image: maven:3.9-eclipse-temurin-17
            shell: bash
            script: mvn -B -Dmaven.repo.local=/harness/.m2/repository test
            report:
              type: junit
              paths:
                - target/surefire-reports/*.xml
        - name: docker-push-sdrepo
          id: docker_push_sdrepo
          build:
            uses: buildAndPushToDocker
            with:
              connector: shibam_dockerhub
              repo: shibam17/sd-devrel-easybuggy
              tags:
                - ${{ pipeline.sequenceId }}
                - latest
              caching: true
Fork the ci-intelligence-lab repository and try the onboarding flow against it, or point the Harness agent at your own repo and see what it generates. Budget about ten minutes for the full setup: creating connectors, letting Harness generate the pipeline, and running your first build. The Harness CI getting started guide covers the full configuration reference.