Deploy your first app with Harness CD in under 15 minutes. Learn how to build, configure, and execute a rolling deployment using a real sample application.

TL;DR
TL;DR: Deploying shouldn't feel like crossing your fingers. With Harness CD, you set up your deployment once and get rollback and a full history of what shipped, without writing it all yourself.
Key takeaways include:
01 Scripts work, until they don't: A simple deploy script is fine when you have one app and one environment. Add a second environment, a rollback, or an approval step, and it gets messy fast.
02 Set it up once, reuse it everywhere: You define what you're deploying, where it goes, and how, as separate pieces. So moving from dev to prod is just a small settings change, not a rewrite.
03 Test the safety net: A green log tells you it worked. Deploying something broken on purpose and rolling back with one click shows you why a real deploy tool is worth it.
Who this is for: Developers or platform engineers who have never run a Harness CD pipeline before. You'll need an SCM account, a Docker Hub (or similar) account, a Kubernetes cluster that a Harness Delegate can reach, and a Harness account. Once the delegate is connected, everything else in this walkthrough happens inside the Harness platform.
The problem with your first deployment
Most teams first few production deployments look the same: SSH into a container, git pull, rebuild, restart the service, and watch the logs for a minute to see if anything screams. It works, right up until it doesn't. A bad build ships, nobody's sure which commit is actually running, and rolling back means remembering the last image tag that worked and doing the whole manual process again, under pressure, at the worst possible time. That's usually 15-20 minutes of frantic SSH for something a rollback button should do in seconds.
That's not a tooling failure so much as a missing layer. Builds are automated. Deployments still aren't for many teams.
Two ways people usually solve this
Hand-roll it in your CI tool: If you're already on GitHub Actions, GitLab CI, or Jenkins, the path of least resistance is to bolt a deploy step onto the end of your build job: kubectl apply or a shell script over SSH. This is genuinely fine for a single service, a single environment, and a single person who understands the script. It stops being fine the moment you need a second environment, a rollback that doesn't involve re-running a script from memory, or an approval gate before production.
Adopt a dedicated CD tool: Splitting build (CI) from deploy (CD) means that the deployment itself, the environment it targets, the strategy it uses, and what happens if it fails become something you configure once and reuse, rather than being re-implemented in every pipeline's YAML. That's the trade you're making by picking this path: a bit more setup up front, in exchange for rollback, approvals, and audit history you don't have to build yourself.
We'll use Harness CD for the deep dive below, deploying a real Java application to a Kubernetes cluster. CD is one piece of Harness's broader Software Delivery Agent; the same governance and audit trail you'll see here also covers builds, infra, and artifacts, so this pipeline slots into a bigger picture rather than being a one-off tool.
Deploying the Sample Application with Harness CD
We're using the easybuggy-vulnerable-application as the sample application. It's a small Java/Tomcat app, and it already ships a working Dockerfile. The repo also has a .harness/ folder with a working pipeline definition already checked in. If you want the fast path, point Harness at that folder directly and skip to step 7. Otherwise, follow the steps below to build it yourself by hand, then compare what you built against that folder afterward.
1. Clone the repo and build the image
git clone https://github.com/harness-community/harness-sample-apps.git
cd harness-sample-apps/easybuggy-vulnerable-application

docker build -t <your-dockerhub-username>/easybuggy:v1 .
docker push <your-dockerhub-username>/easybuggy:v1
If the push succeeds, you'll see something like:
v1: digest: sha256:9f3a1c... size: 1786That artifact digest is your proof that the image actually landed in the registry.
2. Point Harness at your cluster and your registry
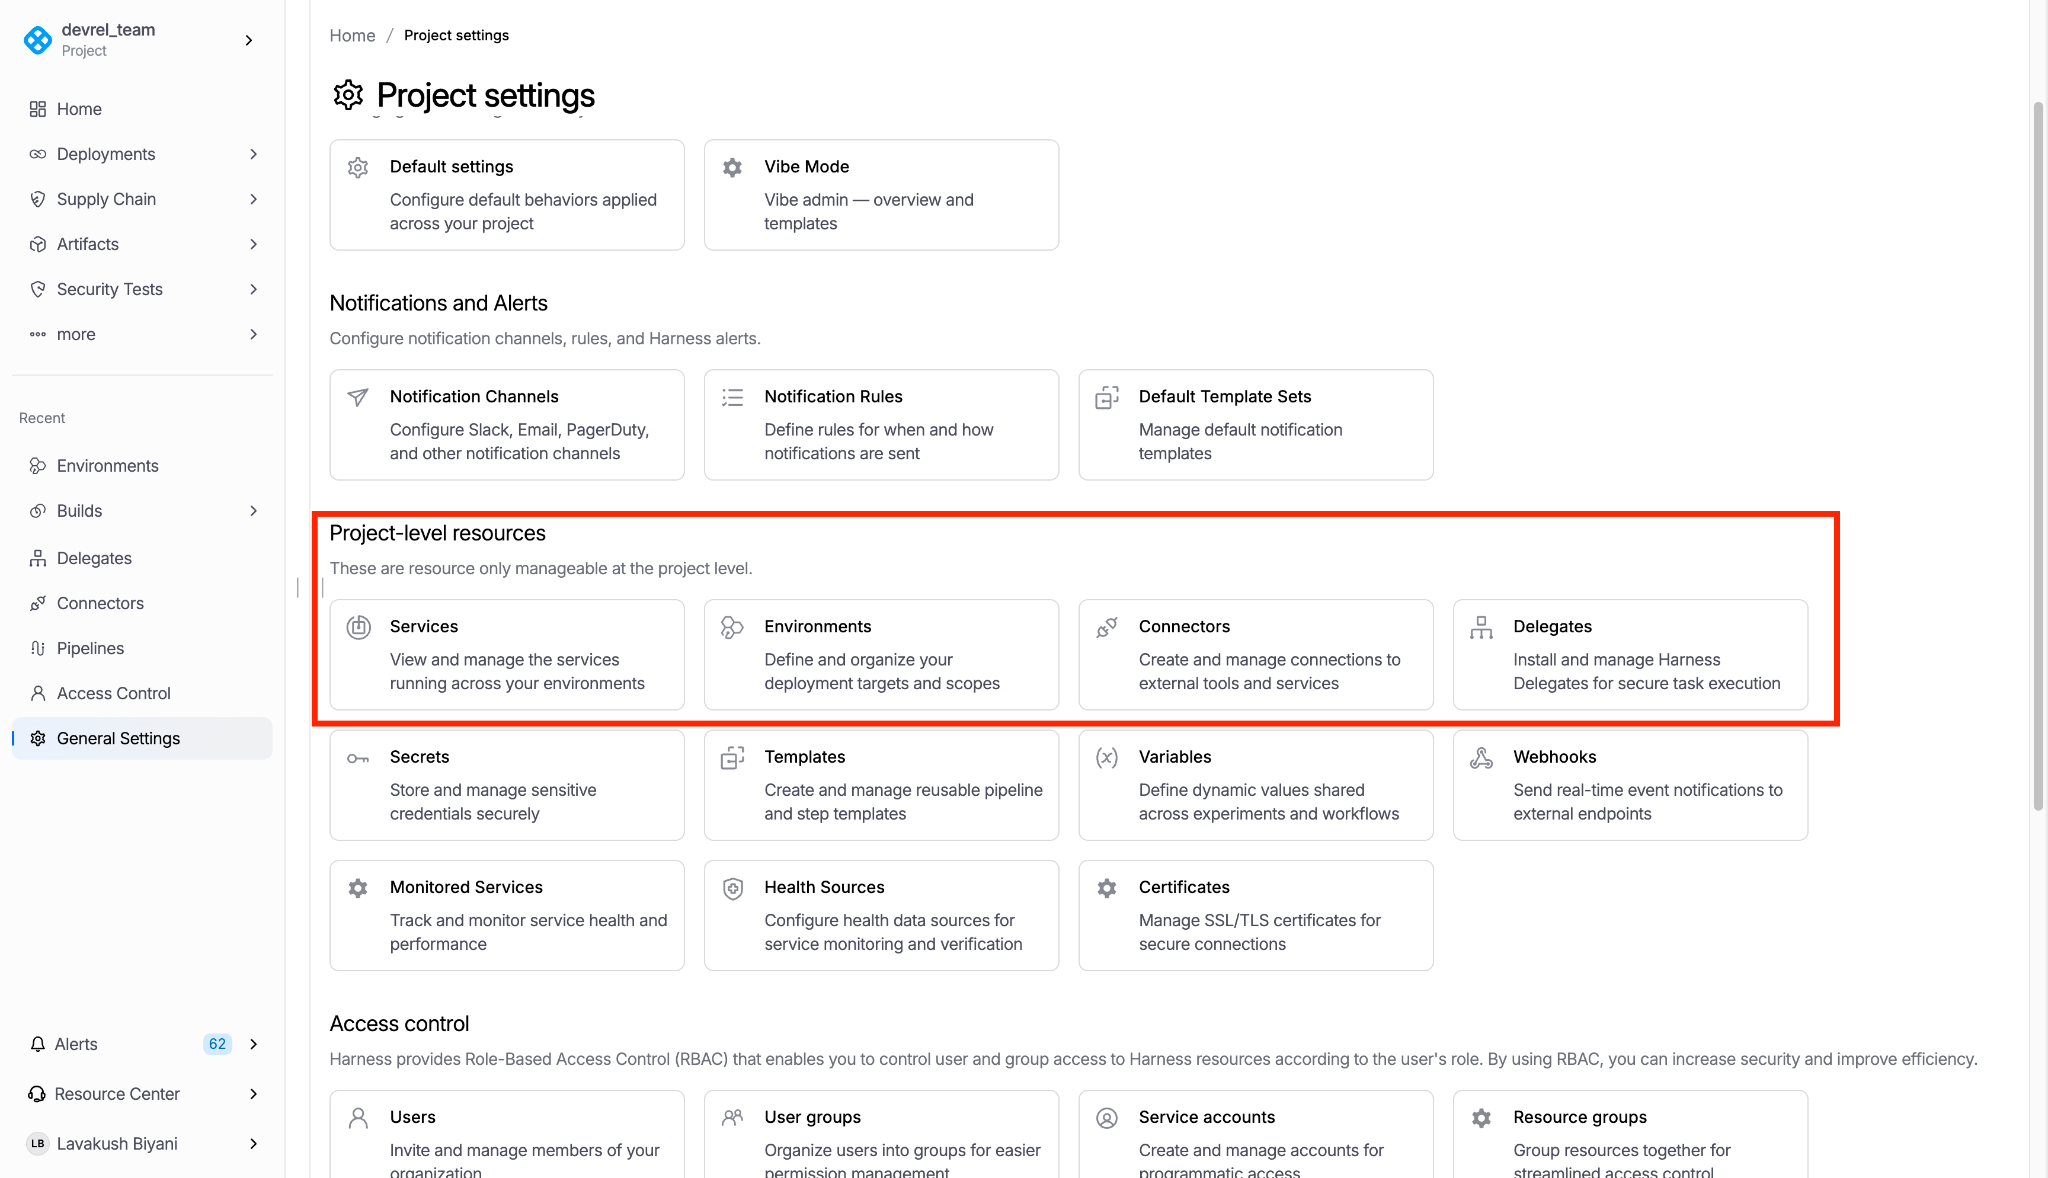
In your Harness project, go to Project Settings → Connectors and create:
Docker Registry connector: A Docker Registry connector pointing at Docker Hub, using the same credentials you just pushed with.
Kubernetes Cluster connector: A Kubernetes Cluster connector pointing to the cluster you'll deploy to (your local kind cluster or a free-tier cluster works fine here). If you don't already have a Harness Delegate running in that cluster, the connector setup walks you through installing one: a lightweight agent that lets Harness reach the cluster and run deployments against it. Harness will hand you a helm install command.
helm repo add harness-delegate https://app.harness.io/storage/harness-download/delegate-helm-chart/
helm install my-delegate harness-delegate/harness-delegate-ng \
 --namespace harness-delegate-ng --create-namespace \
 --set delegateName=easybuggy-delegate \
 --set accountId=<your-account-id> \
 --set delegateToken=<your-delegate-token>
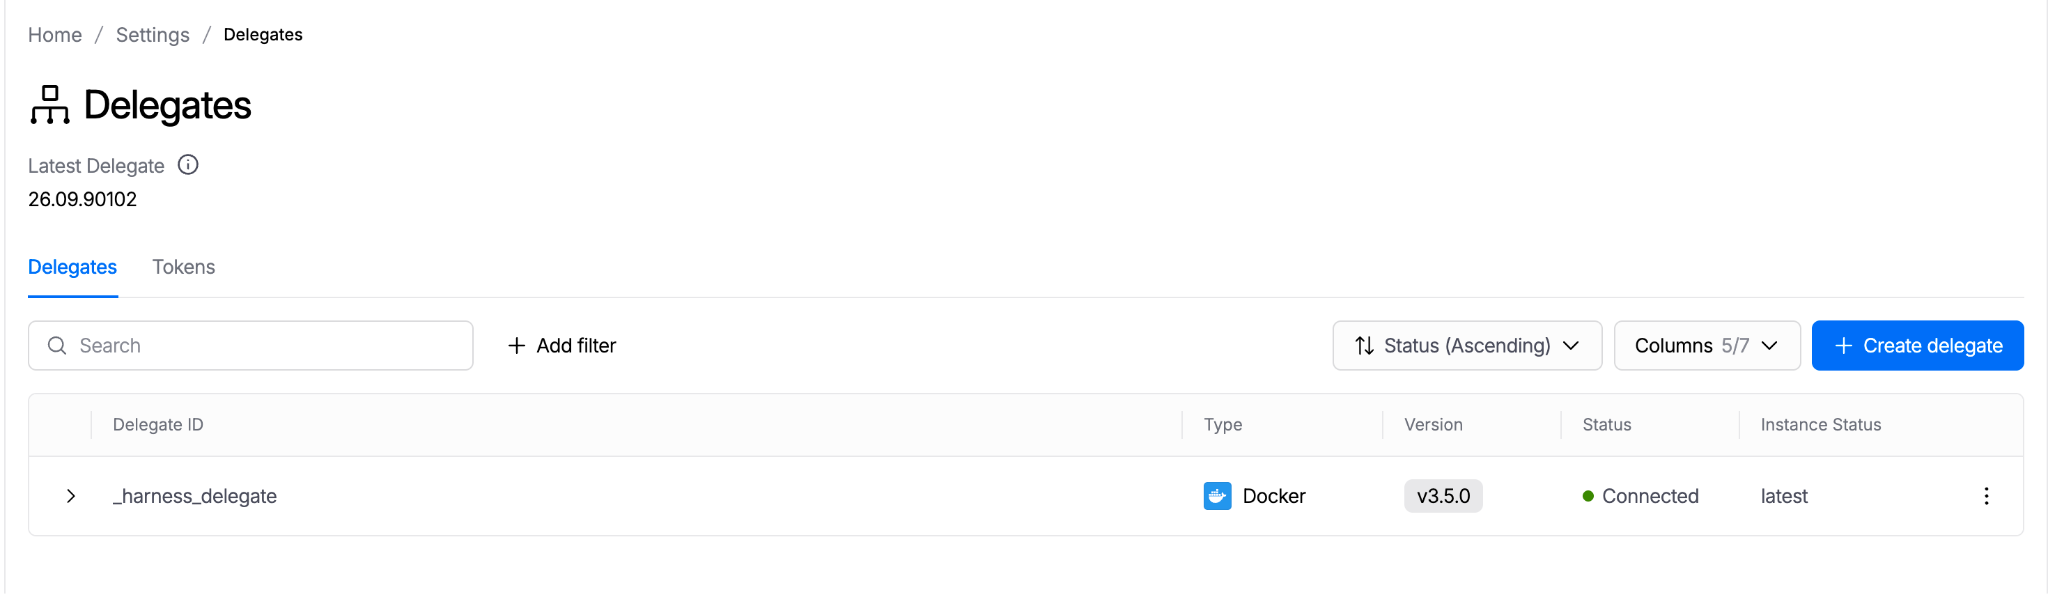
Once that pod is running in your cluster, the Delegates page in Harness (Project Settings → Delegates) will show it as Connected. That status, checked from within Harness, is your confirmation that Harness can reach the cluster; you don't need to inspect the cluster directly to know it worked.
3. Define the Service
A Harness Service is just "what am I deploying, and what does it look like when it's running." Create one service and give it two things: an artifact source (your Docker Registry connector, image easybuggy, tag v1) and a Kubernetes manifest. A bare bones manifest YAML for this app looks like:
apiVersion: apps/v1
kind: Deployment
metadata:
  name: easybuggy
spec:
  replicas: 2
  selector:
    matchLabels:
      app: easybuggy
  template:
    metadata:
      labels:
        app: easybuggy
    spec:
      containers:
        - name: easybuggy
          image: <+artifact.image>
          ports:
            - containerPort: 8080
---
apiVersion: v1
kind: Service
metadata:
  name: easybuggy-svc
spec:
  selector:
    app: easybuggy
  ports:
    - port: 8080
      targetPort: 8080
  type: LoadBalancer
The <+artifact.image> placeholder is Harness variable syntax. At deploy time, it's swapped for whatever image and tag you configured as the artifact source. See adding container images as artifacts for Kubernetes deployments for the full reference on wiring an artifact into a manifest this way. It's also how promoting a build from staging to production later becomes a config change instead of a YAML edit.
4. Define the Environment
A Harness Environment is the named target you're deploying to: dev, staging, or prod. It's kept separate from the Service on purpose, so the same "what am I deploying" definition from step 3 can be promoted through multiple environments later without being rewritten for each one. Create one infrastructure and call it dev.
5. Define the Infrastructure
Under that Environment, add an Infrastructure Definition. This is the specific place the deployment lands: pick Kubernetes, point it to the cluster connector from step 2, and set the namespace you want to deploy to (the default is fine for a first run).
If step 4 answers "which environment," this answers "which cluster and namespace, specifically."
6. Build the pipeline
Create a pipeline with a single Deploy stage:
- Service: the one you just defined
- Environment: dev
- Execution strategy: Rolling. Harness generates the deploy steps for you; you don't need to hand-write this part.
7. Run it
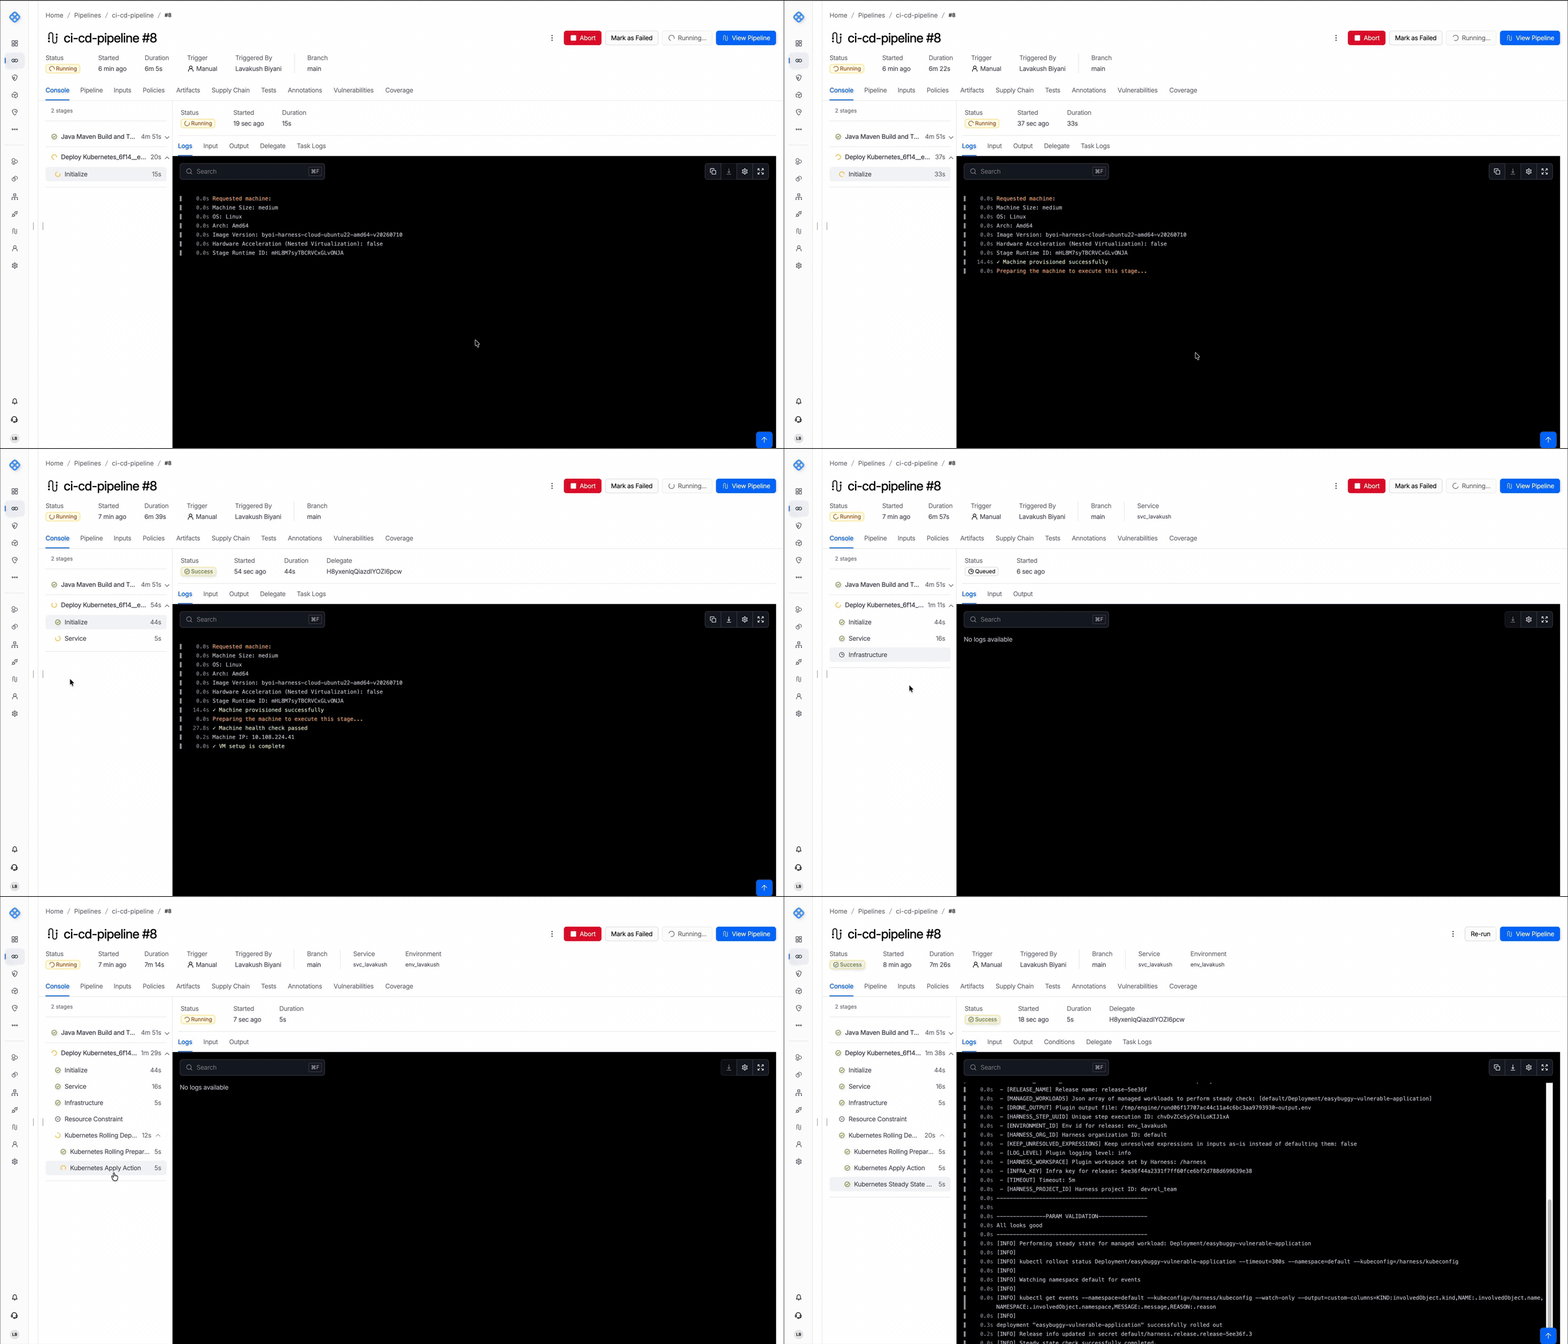
Hit Run Pipeline. You'll watch a live console log scroll through roughly this shape:
Common first-run snags
A few things trip up almost every first Harness CD pipeline. Worth checking before you assume the pipeline itself is broken:
- Delegate stays stuck on "Not Connected." Give it 60 to 90 seconds after the pod starts; the delegate needs to finish registering with Harness before a connector test connection will pass.
- Image pull errors in the pod events: These show up in the execution log for the deploy step. Double-check the Docker Registry connector's credentials match what you used for docker push, and confirm the tag in the Service's artifact source is exactly v1, not latest, unless you pushed latest.
- Pods are stuck in Pending: This is almost always the cluster not having enough allocatable CPU or memory for two replicas at once. Drop replicas to 1 in the manifest and redeploy to confirm that's the cause.
What "it worked" actually looks like
Two things prove this deployment did what it claims to have done, and neither one is a feeling:
- Pipeline execution view: Every step green, a deploy log tied to a specific commit and image digest, and a timestamp. That's your audit trail, and it exists whether or not anyone was watching when it ran.
- Safety net test: Roll something bad on purpose to see the safety net work. Push a tag that intentionally fails (an image name with a typo is enough), point the pipeline at it, and run it again. Harness will fail the rollout and mark the deployment for rollback: no SSH session. That one-click rollback is the actual point of this whole exercise. It's the difference between a deploy tool and a deploy script.
Once you've watched both a clean rollout and a rollback happen once, the numbers that used to be tribal knowledge (who deployed this, what image is actually live, how do we get back to the last good version) become answers you can pull from the pipeline execution log.
Try it yourself
Fork or clone easybuggy-vulnerable-application, point it at your own Kubernetes cluster, and run through the steps above end-to-end. Sign up for a free Harness account if you don't already have one; no credit card required.
If you built the pipeline by hand rather than using the fast path, diff it against the repo's .harness/ folder to see what you'd automate next: Git-based pipeline sync instead of clicking through the UI.
This walkthrough gets you a working rolling deployment to one environment. Next up: Add a Canary Deployment and Approval Gate to This Pipeline. We'll take the same Service definition, promote it to a second environment with manual approval, and swap the Rolling strategy for Canary so that a bad build only ever hits a fraction of the traffic before it's caught.